Previous Topic

Next Topic

Creating an iSCSI VLAN

  1. Launch the NCU.
  2. Read Creating VLANs.

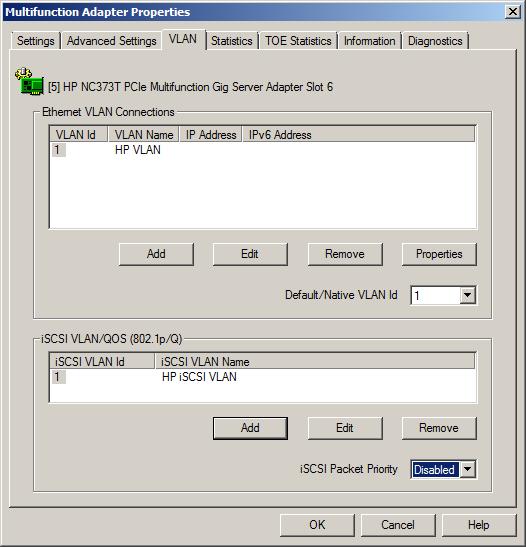
    Select the adapter or team to which you want to assign a VLAN and click VLAN(802.1Q). The VLAN tab shows all the VLANs that currently exist for the adapter or team. The list includes both existing VLANs and new VLANs that have been created but not applied.

    MF Adapter Properties VLAN tab with iSCSI enabled

  3. Click Add.

    VLAN Properties

  4. In the VLAN Name box enter a user-defined VLAN name. Duplicate names are allowed if you want to use the same name for different VLAN IDs.
  5. Select VLAN Id and choose a number. A valid ID is any number that is not already being used for a VLAN defined on this team or adapter and that is in the range of 1–4094.
  6. Select Default VLAN Tagging. This feature adds a VLAN tag to the Default/Native VLAN packet.
  7. Click OK. The new VLAN is added to the iSCSI VLAN/QOS (802.1p/Q) window.
  8. Apply the new VLAN by clicking OK on the Ethernet Devices tab. Adapters or teams with VLANs enabled display a VLAN icon next to its name.
  9. When a VLAN is defined for an adapter, the properties of that adapter may be modified to allow proper VLAN functionality. For example, if 802.1p QoS is enabled on an adapter or team with VLANs and the last VLAN is removed from an adapter or an adapter is removed from a team, the user is given the option to enable or disable 802.1p QoS on the adapter.