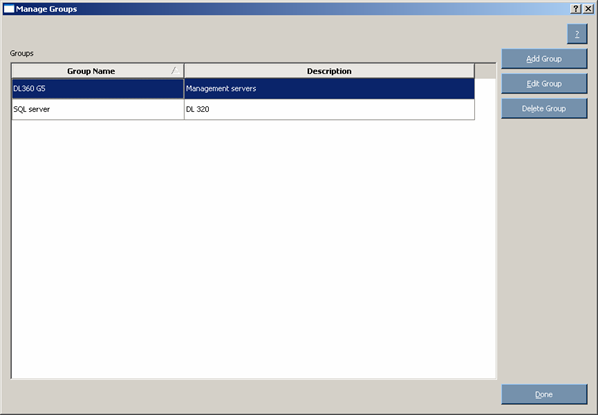
To add, edit, or delete groups, click the
Manage Groups button. The
Manage Groups screen appears.
To add a group:
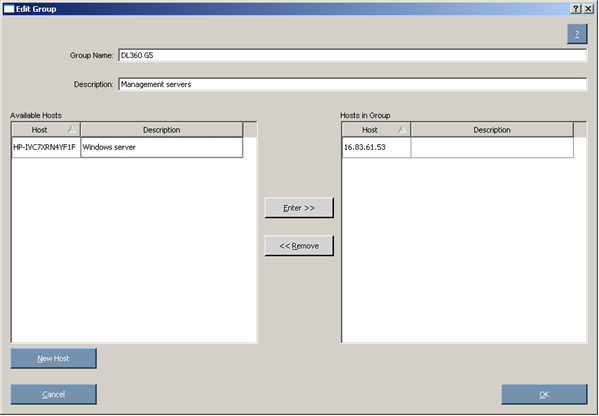
Click Add
Group. The Edit Group dialog box appears.
Enter a group name.
Enter an optional user-defined description
given to the group to be added.
Select the hosts to be added to the group
from the Available Hosts pane. You can add new hosts from this
screen by clicking the New
Host button. For more information on adding hosts, see
"Managing hosts."
Click the Enter button to move the selected hosts
to the new group.
Click OK.
The new group is added to the list on the
Select Installation Host(s) screen.
To edit an existing group:
Select the group, and then on the Manage
Groups screen, click the Edit
Group button. The Edit Group dialog box appears.
Edit the group name as needed.
Edit the optional user-defined description
given to the host as needed.
Click the Enter and Remove buttons to add or remove hosts as
needed.
Click OK.
To delete a group:
Select the group on the Manage Groups
screen, and then click the Delete
Group button.