


Inventory Overview is designed to be a fast and easy view of your hardware and software assets.
This window consists of three major parts:
| · | Data grid |
| · | Toolbar |
| · | Filter selector |
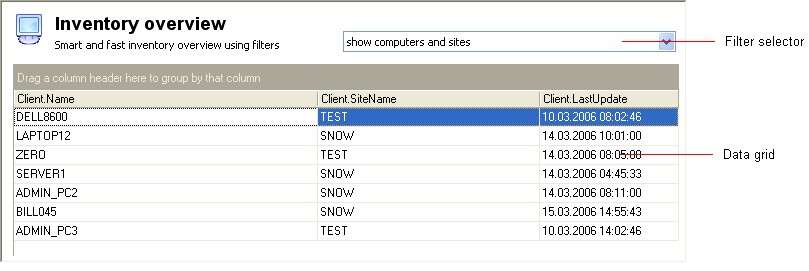
Data Grid
The data grid is a powerful spreadsheet like control that can display your inventory data in various ways.
The most common way is to display all data in columns, like this:
However, you may also display data in grouped mode. Simply drag the column header of the column you want to group by and drop it on the group header (the grayed area just above the grid).
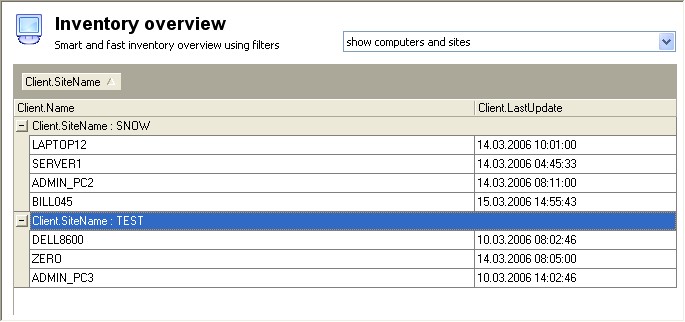
See the Data menu for more grouping and sorting commands.
Toolbar
You find the most common tasks in Inventory Overview in the toolbar:

| · | Details: Displays detailed information about the selected client computer in a dialog box. |
| · | Find: Opens a dialog box where you may enter text you want to locate in the data grid. |
| · | Delete: Removes the chosen client or clients (and all associated information) from the inventory repository. Please use this with function with caution since there is no undo available. |
| · | Refresh: Refreshes the data grid with information from the inventory repository (executes the query one more time). |
| · | Filter: Opens the Filter Manager, a visual SQL query editor. Here you may choose the columns to include in the data grid, and you may compose a query to limit the data in the grid. |
| · | Scan: Lets you scan the selected client computer by using the remote scanning capabilities built into Snow Inventory. |
| · | Control: Starts the remote control guest application, letting you take over the remote client's mouse, keyboard, and display. |
| · | Print: Sends the information in the data grid to your printer. |
| · | Preview: Opens a window where you can preview the information in the data grid before it sent to the printer. |
| · | Export: Shows you the File Export dialog box where you can save the contents of the data grid in several file formats, including HTML, XML, Text, and Microsoft Excel. |
| · | Help: Displays this help information. |
Filter Selector
The Filter selector is located in the top right corner of the window. This combo box lists all the defined filters for Inventory Overview.
![]()
Simply choose a filter from the list, and the filter is applied to the grid instantly.
To create a new filter or to modify the selected filer, click the Filter toolbar button to open the Filter Manager.
See also: