


This tutorial describes the steps to conditionally change a control's appearance. For more information on using styles in the Report Designer, refer to Understand Styles Concepts.
-
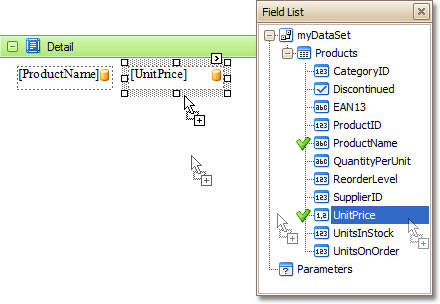
Drop the required fields from the Field Listonto the report's Detail band.
-
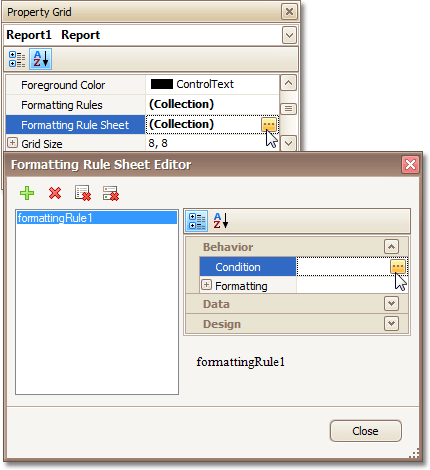
Select the report by clicking anywhere over the blank area around its bands, and in the Property Grid, locate the Formatting Rules Sheetproperty and click its ellipsis button. The invoked Formatting Rule Sheet Editoris intended to manage and customize formatting rules, which then can be defined for the report's bands and controls.
In this dialog, create a new formatting rule (by using the
 button), locate its
Conditionproperty and, again, click its ellipsis button.
button), locate its
Conditionproperty and, again, click its ellipsis button.
-
In the invoked Condition Editor, define the required Booleancondition. In this tutorial, we will format fields if the UnitPricevalue is greater than 30.
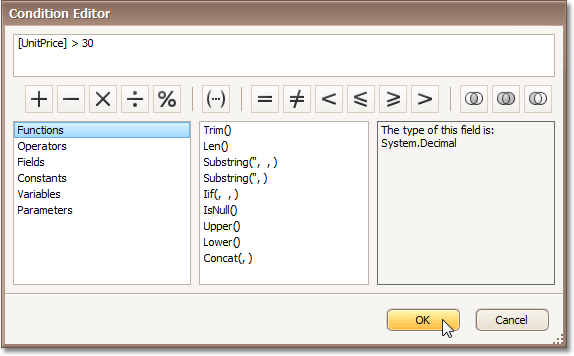
To save the condition and close the dialog, click OK.
-
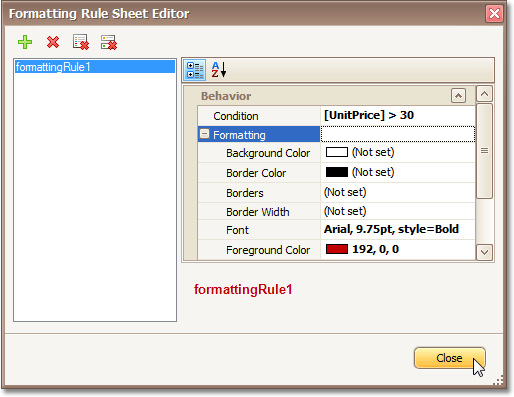
Now, define the formatting to be applied.
-
Select the band or control to which the formatting rule must be applied (in this example it is the Detail band), and in the Property Grid, locate its Formatting Rulesproperty and click its ellipsis button. In the now visible Formatting Rules Editor, move the formatting rule from left to right (using the >button), which means that the rule is to be applied.
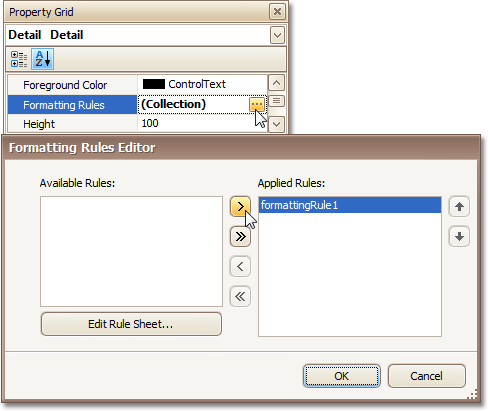
Also, it is possible to customize the precedence of formatting rules, by using the up and down arrow buttons at the right of the dialog. So, the rules are applied in the same order that they appear in the list, and the last rule in the list has the highest priority.
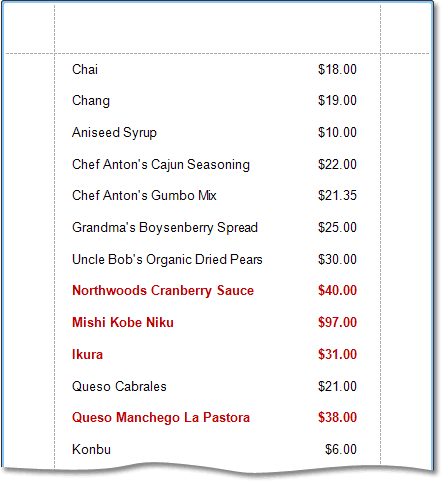
The result is shown in the following image.
 See Also
