
This section provides information on scanning managed devices for a variety of security risks (such as OS and application vulnerabilities, software updates, spyware, system configuration exposures, etc.); remediating affected devices; and generating security alerts, logging, and reports.
NOTE: Managing
security content and patches
For information on downloading and organizing security content,
working with patches, and using custom definitions, see Managing security content and patches.
Read this section to learn about:
Traditionally, security scanning meant checking the currently installed versions of operating system and application specific files and registry keys on a device against the most current known vulnerabilities in order to identify and resolve security risks. LANDesk Security services offers expanded security content types, enabling you to scan for and remediate even more of today's prevalent security risks and exposures.
Depending on your Security Suite content subscription, you can scan for:
NOTE: Security
Suite content subscriptions
For information about Security Suite content subscriptions, contact
your LANDesk reseller, or visit the LANDesk Web site.
The table below describes how the security scanner searches for each type of security risk:
| When scanning for... | Patch and Compliance scans by... |
|---|---|
|
LANDesk software updates |
Using software update definitions published by LANDesk to check for the latest LANDesk software versions. |
|
Windows vulnerabilities |
Using vulnerability definitions published by LANDesk (based on official vendor security bulletins to check for known operating system and/or application vulnerabilities). |
|
Macintosh vulnerabilities |
Using vulnerability definitions published by LANDesk (based on official security bulletins to check for known vulnerabilities). |
|
Linux/UNIX vulnerabilities |
Using vulnerability definitions published by LANDesk (based on official security bulletins to check for known vulnerabilities). |
|
Custom definitions |
Using custom vulnerability definitions created by a LANDesk Administrators to check for a user-defined platform, application, file, or registry settings conditions. |
|
Security threats |
Using security threat definitions published by LANDesk to check for local Windows system configuration errors and exposures. You can modify security threat definitions that use editable custom variables to check for specific conditions. |
|
Spyware |
Using spyware detection definitions that check for instances of spyware programs on scanned devices. Patch and Compliance uses the LANDesk Software license monitoring tool's softmon.exe program to monitor for spyware. You can also enable real-time spyware monitoring and blocking with a device's agent configuration. |
|
Driver updates |
Using third-party driver update definitions that check for driver versions. |
|
Software updates |
Using third-party software update definitions that check for software versions. |
|
Antivirus updates |
Using antivirus scanner detection definitions (NOT actual virus
definition/pattern files) that check for: |
|
Blocked applications |
Using application definitions published by LANDesk (or user-defined application definitions) to immediately deny end user access to the application by editing the local registry. Remediation is NOT a separate procedure. Patch and Compliance uses the LANDesk Software license monitoring tool's softmon.exe program to deny access to specified application executables, even if the executable file name has been modified, by reading the file header information. (See the legal disclaimer for the blocked application type.) |
To understand how Patch and Compliance remediates these different content types, see the How Patch and Compliance remediates different security risks.
After reviewing downloaded definitions and deciding which items you want to scan for, you can perform customized security assessment on managed devices by moving definitions into their respective Scan groups. When the security scanner runs, it always reads the contents of the Scan group and scans for those specific definitions (IMPORTANT: If that type is selected in the task's scan and repair settings). Before scanning devices, you should always make sure the appropriate definitions are in the Scan group. You can move definitions into and out of the Scan group manually at any time.
You can also update security content which, by default, automatically adds new definitions into the Scan group.
NOTE: Blocked
applications are placed in the Unassigned group by
default
Keep in mind that the blocked application type is handled
differently than the other types. By default, blocked application
definitions are placed in the Unassigned group, not in the Scan
group.
Security scans add patch and compliance information to a device's inventory in the core database. This information can be used to generate specific queries, policies, and reports. To view this information, right-click the device and then click Security and Patch Information.
NOTE: Caution
about moving definitions from the Scan group
When you move definitions from the Scan to the Don't Scan group,
the current definition assessment information (information located
in the core database about which scanned devices detected those
definitions) is removed from the core database and is no longer
available in either the definition Properties dialog boxes or in
the device Security and Patch Information dialog boxes. To restore
that information, you would have to move the definitions back into
the Scan group and run the scan again.
The security scanner can be run directly at a device (Click Start | All Programs | LANDesk Management | Security Scanner). The security scanner can also be run as a scheduled task or a policy from the core server.
IMPORTANT: LANDesk
Script Writers group permission required
In order to create scheduled tasks and policies in the Patch and
Compliance tool and the Security Configurations tool (for security
and compliance scan tasks, repair tasks, and change settings
tasks), a user must have the LANDesk Script Writers group
permission. In other words, they must belong to a group that has
the LANDesk Script Writers permission assigned. For more
information about role-based administration, see Role-based administration.
Scheduled tasks can be thought of as a push distribution because the task is pushed from the core server to devices, while a policy is considered a pull distribution because the policy agent on the device checks the core server for applicable policies and then pulls the patch from the core server.
NOTE: Compliance
security scans
With the Patch and Compliance tool you can also create a
compliance-specific scan task, that checks target devices for
compliance with your customized security policy. A compliance scan
is based on the contents of the Compliance group (and the
options specified on the compliance settings), and can be run as a
scheduled task, a policy, and even initiated by LANDesk Antivirus
when a virus is detected that can't be removed or quarantined.
You can also run an immediate on-demand scan on one or more target devices.
To do this, right-click the selected device (or up to 20 multi-selected devices), click Security / Compliance scan now, select a scan and repair settings, choose the type of scan, and then click OK.
The security scanner writes a log file for the most recent scan on the device called vulscan.log, and also saves the last five log files in chronological order by number. These log files record useful information about the time of the scan, language, platform, and the processes run by the scan.
To see when the last security scan was run on a device, right-click the device, click Inventory, and then scroll down to the Last Scan Dates in the right-hand pane of the Inventory view.
Patch and Compliance gives you complete control over what the end user sees, device reboot behavior, and the level of interaction the end user is allowed when the security scanner runs on devices. For example, depending on the purpose or scheduled time of a scan you may want to show the end user scanner progress and give them the opportunity to cancel or defer an assessment scan or patch deployment remediation. You can do this by creating and applying scan and repair settings.
Scan and repair settings is also where you determine the content of a security scan, by selecting specific definition types.
You can create and apply scan and repair settings (a saved set of configured options) to scan tasks. You can create as many scan and repair settings as you like. Some scan and repair settings might be well suited for a variety of scanning or remediation tasks, while others might be specifically designed for a single task.
All of the scan and repair settings you create are stored in the Scan and Repair group located under Settings in the tree view.

Once configured, you can apply scan and repair settings to security scan tasks, repair tasks, uninstall tasks, reboot tasks, and change settings tasks.
NOTE: Compliance
settings
With the Patch and Compliance tool you can also create
compliance-specific settings, that determine when the frequent
security scan runs and how detected risks are remediated. A
compliance scan is based on the contents of the Compliance
group (and the options specified on the compliance settings), and
can be run as a scheduled task, a policy, and even initiated by
LANDesk Antivirus when a virus is detected that can't be removed or
quarantined.
A device's default scan and repair settings are deployed as part of the initial agent configuration. When a task has a different scan and repair settings associated or assigned to it, the default settings are overridden. You can also choose to use the device's default settings by selecting it when you create a task.
At some point you may want to change these default scan and repair settings on certain devices. Patch and Compliance provides a way to do this without having to redeploy an entirely new and complete agent configuration. To do this, use the Change settings task located in the drop-down list of the Create a task toolbar button.
The dialog box that appears allows you to enter a unique name for the task, specify whether it is a scheduled task or policy, and either select an existing scan and repair settings as the default or use the Edit button to create a new scan and repair settings as the default for target devices.
With custom variables you can fine-tune security threat scanning by modifying one or more setting's values so that the scanner checks for conditions you define, and therefore determines a device to be vulnerable only if that condition is met (i.e., the value you specify is detected). Some system configuration security threat definitions have variable settings that you can change before including them in a security scan. Typically, antivirus definitions also have custom variable settings.
NOTE: Edit Custom
Variables right required
In order to edit custom variable settings, a LANDesk user must have
the Edit Custom Variables role-based administration right. Rights
are configured with the Users tool.
Every security definition with customizable variables has a unique set of specific values that can be modified. In each case however, the Custom Variables page will show the following common information:
To change a custom variable, double-click the Value field, and either select a value if there's an available drop-down list, or manually edit the value, and then click Apply. Note that some variables are read-only and can't be edited (this is usually indicated in the description).
NOTE: Custom
variable override settings
In some situations you may want to ignore a custom variable
settings, or in other words create an exception to the rule. You
can do this with a feature called custom variable override
settings. Custom variable override settings let you decide which
custom variables to essentially ignore when scanning devices so
that they are not detected as vulnerable and are not remediated
even if they meet the actual conditions of a definition's detection
rules. A user must have the Edit Custom Variables right in order to
create or edit a custom variable override settings. You can create
as many custom variable override settings as you like, and apply
them to devices using a Change settings task. For more
information, see About the Custom variable
override settings dialog box.
If the security scanner discovers any of the selected definitions on target devices, this information is reported to the core server. You can use any of the following methods to view detected security data after running a scan:
In the Patch and Compliance tool window, select the Detected group to view a complete listing of all definitions detected by the most recent scan.
The Scanned column indicates how many devices were scanned for a definition, and the Detected column shows how many of those devices are affected by that definition.
Right-click a definition, and then click Affected computers to view a list of devices on which the definition was detected by the most recent scan.
Right-click a specific device in the network view, and then click Security and Patch Information to view detailed security assessment information and patch deployment status for the device.
You can also select multiple devices in the network view, right-click the group, and then click Security and Patch Information to view a list of definitions discovered on one or more of those devices. When you select a definition in the list, the devices on which the definition was detected by the most recent scan display in the bottom pane.
In the Patch and Compliance tool window, click the Scan information toolbar button to view detailed patch deployment activity and status for scanned devices on your network. You can view scan results for computers not recently reporting, computers with no results, and computers needing patches by selected severity type.

If you're working in a large, distributed enterprise network, you may want to forward the latest security scan results to a rollup core server located in a specific region in order to facilitate access to real-time vulnerability information for all of your managed devices. You can enable automatic and immediate security scan results forwarding by defining the rollup core settings in the Patch and Compliance tool.
Every time the security scanner runs it writes a scan results file to a folder called VulscanResults on the core server and notifies the LANDesk Security web service, which adds the file to the core database. If the rollup core settings are enabled and a valid rollup core is identified, the rollup core reads the scan results file into its own database, providing faster access to critical vulnerability information.
Once you've updated security content for the content types you've have a license or subscription for, scanned devices, determined which detected security exposures require attention, and downloaded patches, the next step in implementing Patch and Compliance security is to remediate (or repair) the security problem).
Remediation solutions and actions are different depending on the type of security risk. Furthermore, some remediation can be done remotely with the Patch and Compliance tool, while other remediation tasks must be done manually. For example, vulnerabilities are remediated by deploying and installing the necessary security patches on affected devices, while spyware is remediated by removing the infecting spyware itself, and a system configuration security threat is typically remediated by editing the registry or changing some other platform-specific settings.
Remediation for each type of security risk (i.e., content type) is described below:
For known vulnerabilities, remediation entails deploying and installing the appropriate security patch. Windows and Macintosh vulnerability remediation can be performed via the console, as a scheduled task, or policy-based remediation, or as an autofix scan. However, Linux and UNIX vulnerability remediation must be done manually at the affected device.
For custom definitions, remediation can consist of deploying a custom patch or script that addresses the exposure. Like known vulnerability remediation, custom vulnerability repair tasks can be done via the console.
For LANDesk software updates, remediation means the proper version upgrade is installed. You can do this via the console.
For security threats (local Windows system or platform configuration errors and exposures), remediation means applying the configuration settings specified by the security threat definition. You can do this via the console. You can also modify security threat definitions that use editable custom variables to apply customized settings.
Some security threats must be remediated manually at the affected device. To find out whether a security threat can be remediated from the console, view its Repairable column value (Yes or No) in the item list view.
For Windows firewall configurations, remediation means applying configuration settings specified by Windows firewall settings or predefined security threat definitions.
Windows firewall settings are associated with a change settings task to enable/disable the firewall, and configure firewall settings including exceptions, inbound rules, and outbound rules (for services, ports, programs) on target devices running the following Windows platforms:
Additionally, LANDesk Security provides predefined security threat definitions that let you scan for, detect, and configure firewall settings on managed devices running specific Windows platforms. The following security threat definitions let you scan for and modify firewall configurations:
The Windows firewall security threat properties includes custom variables that let you configure Windows firewall settings. You can use these security threat definitions to scan for your specified settings and return a vulnerability condition if those settings are not matched. You can then use the customized definition in a repair task in order to turn on or off the firewall as well as change or reconfigure the firewall settings on the scanned device.
NOTE: Windows GPO
could change firewall settings
You should be aware that it is possible for a Windows Group Policy
Object (GPO) to interfere with firewall settings configured with
the security scanner. For example, the firewall settings you define
in the Configure the Windows Firewall security threat's custom
variables dialog box and that are then implemented by a security
scanner repair task could be changed back to their original value
according to how the settings are defined in an active Group Policy
Object.
For spyware, remediation consists of removing the violating spyware application. This can be done remotely from the console with a repair task.
You can also configure a device for real-time spyware monitoring (scanning, detection, and removal). In order to use real-time spyware monitoring, you must enable the settings in the device's agent configuration. On the Spyware page of the Agent configuration dialog box, select the appropriate spyware monitoring options to enable real-time spyware monitoring and end user notification. Real-time spyware monitoring uses the LANDesk Software license monitoring tool's softmon.exe program to monitor for spyware and to create log files that are read by the security scanner when it scans for spyware definitions on target devices.
NOTE: Autofix must
be enabled for real-time spyware monitoring
In order for real-time spyware scanning and detection to work,
downloaded spyware definitions must have the autofix option
enabled. You can manually enable the autofix option for spyware
definitions in item lists in the Patch and Compliance tool window.
Or you can configure spyware definition updates so that the autofix
option is turned on by default when spyware definitions are
downloaded.
For blocked applications, remediation is NOT a separate task. Application blocking takes place as part of the security scan itself, by editing the registry on the local hard drive to disable user access to any unauthorized applications.
Patch and Compliance uses the LANDesk Software license monitoring tool's softmon.exe program to deny access to specified application executables, even if the executable file name has been modified, by reading the file header information.
Antivirus updates are available for several common antivirus products, including LANDesk Antivirus. See the Definition types list in the Download updates dialog box to see the antivirus scanner engines that are supported, meaning the antivirus scanners you can download detection definitions for.
NOTE: Antivirus
scanner detection content versus virus definition content
Antivirus updates does not imply actual virus definition (or
pattern) files. When you download third-party antivirus updates,
only scanner detection content is downloaded to the default
repository, but scanner-specific virus definition files are not
downloaded. However, when you download LANDesk Antivirus updates,
both the scanner detection content AND the LANDesk
Antivirus-specific virus definition files are downloaded. LANDesk
Antivirus virus definition files are downloaded to a separate
location on the core server. The default virus definition file
repository is the \LDLogon\Antivirus\Bases folder.
Antivirus updates are scanner definitions that detect:
When you deploy a security scan with antivirus scanner detection definitions, the security scanner checks whether an antivirus scanner engine is installed on managed devices, whether real-time scanning is enabled or disabled, whether the scanner's pattern files is up to date, and when the latest scan was run on the device. You can remotely enable real-time scanning if it's turned off.
The table below describes how Patch and Compliance remediates each type of security risk:
| When remediating... | Patch and Compliance remediates by... |
|---|---|
|
LANDesk software updates |
Deploying and installing the appropriate LANDesk software update. |
|
Windows vulnerabilities |
Deploying and installing the required patch files (patch files must already be downloaded to the local patch repository). |
|
Macintosh vulnerabilities |
Deploying and installing the required patch files |
|
Linux/UNIX vulnerabilities |
Remediation is performed manually at the affected device. |
|
Custom definitions |
Deploying and installing patch files, if the associated detection rule allows remediation, and if the specified patch files are available. |
|
Security threats |
Applying configuration settings specified by the security threat definition. You can do this via the console. You can also modify security threat definitions that use editable custom variables to apply customized settings. Some security threats must be remediated manually at the affected device. To find out whether a security threat can be remediated from the console, view its Repairable column value (Yes or No) in the item list view. |
|
Spyware |
Removing the detected spyware instance. See the spyware section above for more information on real-time spyware detection and removal. |
|
Driver updates |
Deploying and installing the appropriate third-party driver update. |
|
Software updates |
Deploying and installing the appropriate third-party software update. |
|
Antivirus updates |
Allowing you to re-enable real-time scanning if it's been turned off. The other antivirus scanner detection definitions return status information about specific antivirus scanner engine installations, pattern file versions, and last scan dates (related issues can't be remediated remotely from the console). |
|
Blocked applications (published and custom) |
Denying access to the application, even if the program's executable file name has been changed, by reading the file header information. Remediation in this case is NOT a separate procedure. Application blocking is done during the security scan process. The security scan immediately denies end user access to the application by editing the registry. (See the Legal disclaimer for the blocked applications type.) |
To understand how Patch and Compliance scans for these different content types, see the How Patch and Compliance scans for different security risks.
As stated above, Windows and Macintosh vulnerabilities, custom definitions, LANDesk software updates, and blocked applications can be remediated from the console. The Remediation methods section below describes these different methods.
Patch and Compliance performs an intelligent remediation by installing only those patches that are needed on each individual device, not all of the patches referenced by all of the vulnerabilities included in the repair job. The tool also takes advantage of LANDesk's enhanced package deployment capabilities for fast and efficient patch deployment, such as: Targeted Multicast, peer download, and checkpoint restart. For more detailed information about these software distribution features, see Software distribution.
You can remediate a single detected definition or a set of them with any of the three remediation methods described below.
To remediate one definition at a time, right-click the item and then click Repair.
To remediate a set of definitions together, copy definitions from any of the content groups into a custom group (see Understanding and using the Patch and Compliance tool, right-click the group, and then click Repair). The Auto Fix method isn't available for custom groups; however, you can multi-select definitions in a listing, right-click and select Auto Fix.
Supported Windows and Macintosh devices can be remediated remotely from the console, but other platforms such as Linux and UNIX Sun Solaris can only be scanned from the console, not remediated.
You must manually install the appropriate patches on both Linux and UNIX devices in order to remediate them.
Patch and Compliance provides the following methods to remediate affected devices from the console:
Scheduled task remediation can be thought of as a push distribution because the patch is pushed from the core server to devices, while a policy is considered a pull distribution because the policy agent on the device checks the core server for applicable policies and then pulls the patch from the core server.
Scheduling a remediation or repair task is useful if you want to set up the task to run at a specific time in the future, or as a recurring task. Patch and Compliance uses the Scheduled Tasks tool to configure and process a scheduled repair task.
Scheduled task remediation is supported on both Windows and Macintosh devices.
IMPORTANT: LANDesk
Script Writers group permission required
In order to create scheduled tasks and policies in the Patch and
Compliance tool and the Security Configurations tool (for security
and compliance scan tasks, repair tasks, and change settings
tasks), a user must have the LANDesk Script Writers group
permission. In other words, they must belong to a group that has
the LANDesk Script Writers permission assigned. For more
information about role-based administration, see Role-based administration.

Policy-based remediation offers flexibility by letting you dynamically target devices based on the results of a custom LDAP or core database query. For example, you can configure a remediation policy so that it runs only on devices in a particular directory container, or only on devices running a specific OS (or any other inventory attribute that can be queried). Patch and Compliance uses policies in the Scheduled tasks/Software distribution tool to configure and process remediation policies.
NOTE: Supported
platforms for policy-based remediation
Policy-based remediation is supported on Windows devices only.
Macintosh devices can't be remediated via the application policy
method.
In order to be remediated by a policy, a device must have the Software distribution agent installed. When the agent runs, it checks the core database for policies that might apply to it. If such policies exist, a dialog appears at the device showing recommended and optional policies (required policies are automatically applied).
Remediation (repair) policies operate in much the same way as application policies do, except you're distributing patch files instead of application files. Policy management prerequisites, task flow, policy types, and static and dynamic targeting are essentially identical between repair policies and application policies.
Auto Fix is a convenient, integrated method for quick remediation in cases where you don't want to create a scheduled task or policy-based repair task. For example, if there is a new known vulnerability that you want to scan for and repair in a single process, you can use the Auto Fix feature.
Auto fix is available for the following content types: vulnerabilities, spyware, LANDesk software updates, and custom definitions.
NOTE: Requirements
for using Auto Fix
Only Administrators or users with the Patch Manager right AND the
Default All Machines scope can enable the Auto Fix feature for
applicable definitions. LANDesk users without either the LANDesk
Administrator or Patch Manager right won't even see this option on
a definition's shortcut (right-click) menu. For more information on
rights and scope, see Role-based administration.
Auto fix has to be enabled in two places in order to work properly. First, the auto-fix option must be turned on, and secondly the scan and repair settings must be applied to the scheduled scan task. If either one of these two item's autofix option is NOT enabled, autofix will not happen.
When Auto Fix is enabled in both places mentioned above, the next time the security scanner runs (either manually or via a scan task), Patch and Compliance automatically deploys and installs the required patch on any affected device. With Auto Fix, if a patch requires a reboot, the target device always automatically reboots.
You can enable Auto Fix for an individual definition, or a multi-selected group of definitions at once.
Automated remediation entails deploying and installing patches on managed devices, by any of the three methods described in the sections above.
It is important to remember that a repair job can include remediation for one or more detected security definitions. Furthermore, a single detected definition can require the installation of one or more patches to fix. Because of these factors, remediation might imply the installation of just one patch file on the device, or the installation of several patch files on the device, depending on the number and type of detections.
Almost all patch files install silently, meaning transparently, requiring no user interaction at the end user device itself. Some Windows 9.x patches and non-English patches do not install silently. You can tell whether a patch installs silently or not by checking the Silent Install column in a patch listing. For more information, see Understanding and using the Patch and Compliance tool earlier in this section.
However, whether a patch file can install silently or not, you can now configure how much you want the security scanner to display and prompt for input on the end user device with the scan and repair settings feature.
NOTE: Consolidated
reboot
If a patch file installation requires a reboot (AND the Never
reboot option isn't selected on the Reboot page of the scan and
repair settings applied to the task in question), Patch and
Compliance first installs ALL of the specified task's patches on
the device, and then reboots the device once.
Custom definition remediation can include special additional commands that are defined when you create a custom detection rule. Additional commands run in the order specified on that rule's Commands tab, and according to the arguments for each command. Additional commands can run before, during, or after the patch file itself executes.
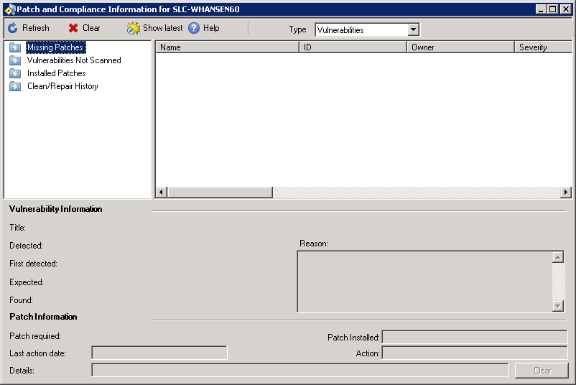
As mentioned above, one way to view scanned security data is by device. To do this, right-click a single device or a group of selected devices, and then click Security and Patch Information.
This page provides many useful functions. With one or more devices selected, you can:
You can also right-click definitions and detection rules in their respective item lists to run common tasks for one or more affected devices.
To see when the last security scan was run on a device, right-click the device, click Inventory, and then scroll down to the various Last Scan Dates in the right-hand pane of the Inventory view.
After performing remediation on affected devices, Patch and Compliance reports the status of each patch installation. You can check the status of patch installation per vulnerability/definition and per target device.
The Install status field indicates whether the installation was successful. Possible states include: Succeeded, Failed, and Failed to Download.
If a patch installation failed, you must first clear the install status information before attempting to install the patch again. You can clear the install (repair) status for the selected device by clicking Clear on the Security and Patch Information dialog box. You can also clear the patch install status by vulnerability.
You can clear vulnerability scan and repair status information for all devices affected by a vulnerability (or vulnerabilities with the Clear scan/repair status dialog box. As stated above, if a patch installation fails, you must first clear the install (repair) status before attempting to install the patch again.
You can also use this dialog box to remove vulnerability scan information from the database for one or more vulnerabilities.
To clear vulnerability scan and repair status, right-click the vulnerability and select Clear scan/repair status, select the desired options, and then click Clear.
The following section describes other tasks you can perform with the Patch and Compliance tool.
Patch and Compliance provides a tool that lets you create a device reboot task. A reboot task can be useful when you want to install patches, without rebooting, as a single process and then reboot those remediated devices as another separate task. For example, you can run a scan or a patch install task during the day, and then deploy a reboot only task at a more convenient time for end users.
You can configure patch and compliance security alerting so that you can be notified when specific vulnerabilities are detected on managed devices in your system. Patch and Compliance's vulnerability alerting uses the standard LANDesk alerting tool.
A vulnerability must copied to the Alert group in order to generate an alert when detected. A vulnerability in the Alert group is a copy, and also resides in the Scan group. After placing the desired vulnerability definitions in the Alert group (either manually, or by specifying the severity level vulnerabilities to automatically be placed during downloads), you can configure the alert interval in the Configure alerts dialog box.
Patch and Compliance information is represented by several reports in the Reports tool. These reports provide useful information about security risk assessment, compliance, patch deployment, and remediation status for scanned devices on your network, for each of the various security risk content types.
In order to access the Reports tool, and generate and view reports, a user must have the LANDesk Administrator right (implying full rights) and the specific Reporting roles.
For more information about using the Reports tool, see Reports.