Using automatic actions to forward messages


You can forward messages using an automatic command. This command will differ, depending on the external application to which you want to forward the message:

To configure an automatic action

  1. First, configure the message, as described in the topic Using WMI policies to intercept incoming messages. Use a message text like "Could not forward message to ..." and set a property to prevent loops. See How to prevent loops for details. This message is primarily for troubleshooting purposes. If the forwarding succeeds, then no additional message will be generated.
  2. Configure the automatic action by following these steps.

    From the WMI policy editor, select the Rules tab.

    Select New to open the New Rule dialog box.

    Select the Actions tab.
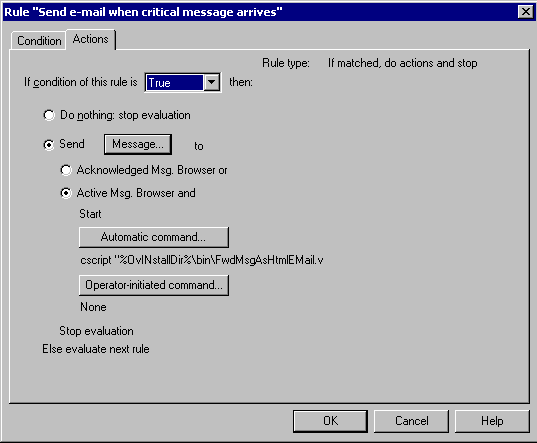
    Configure a VB script. It gets the message ID as a parameter:

    cscript.exe "%OvInstallDir%\bin\MyForwardingScript.vbs" "<$WBEM:TargetInstance.Id>"

    The following example shows the call of an executable which receives additional attributes of the message as parameters:

    "C:\Program Files\Test\Forward.exe" "<$WBEM:TargetInstance.Id>" "<$WBEM:TargetInstance.Text>" "<$WBEM:TargetInstance.Object>"
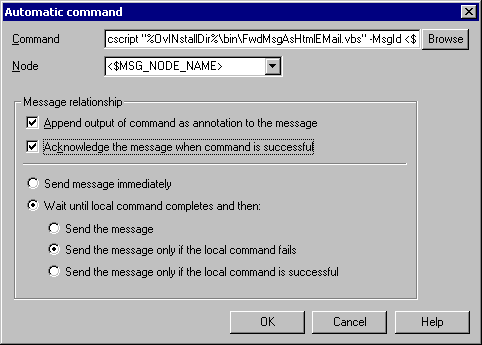
  3. Click Automatic command to open the Automatic Command dialog box. Be sure that Wait until local command completes and then and send the message only if the local command fails are selected, so that the error message you configured above is only generated when the forwarding command fails.

Note NOTE:
It is also a good idea to select Acknowledge the message when command is successful because it might happen that the forwarding fails due to a network problem or other external cause. You will then get a corresponding error message. After the external problem is solved, you can restart the automatic command, initiating the forwarding again. If it then succeeds, it will automatically acknowledge the error message in your message browser.

Related Topics: