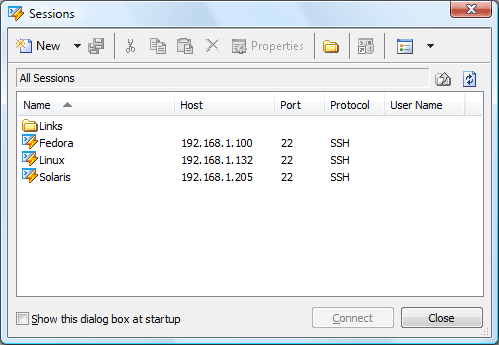
The Sessions dialog box allows you to create and manage sessions. By default the dialog box opens automatically when Xshell starts. You can also open it by clicking Open on the File menu.

A session contains properties information of a connection to a remote computer. By creating sessions, you can save your efforts to enter the remote hostname and other required information when connecting to a known computer.
The toolbar contains a number of buttons to manage sessions.
| Button | Name | Description |

|
New | Opens the New Session Properties dialog box. |

|
Save As | Copies the selected session as a new name. |

|
Cut | Cuts the selected session and copy it to the clipboard. |

|
Copy | Copies the selected session to the clipboard. |

|
Paste | Saves the session copied to the clipboard in the current folder. If you cut the session, the original session is saved unchanged. If you copied the session, a copy of the original session is saved. |

|
Delete | Deletes the selected session. |

|
Properties | Opens the Properties dialog box of the selected session. |

|
Open Session Folder | Opens the folder where sessions are saved. |

|
Shortcut | Creates a shortcut icon of a selected session. |

|
View Type | Shows sessions as large icons, small icons, list, or list with additional columns. |
If this check box is selected, Xshell opens the Sessions dialog box automatically when it starts. You can clear the check box to make this feature unavailable.
ConnectConnects to a remote computer using a selected session and closes the dialog box.
CloseCloses the dialog box.
Note: Xshell also supports a Default Session that can be used when you connect to a remote computer without a saved session. You cannot open and edit the default session in this dialog box. To change the default session, you can click Properties on the File menu while Xshell is not connected to a remote computer or from the Standard Buttons toolbar of the Xshell main window, click the arrow button next to Properties, and then select Default session.