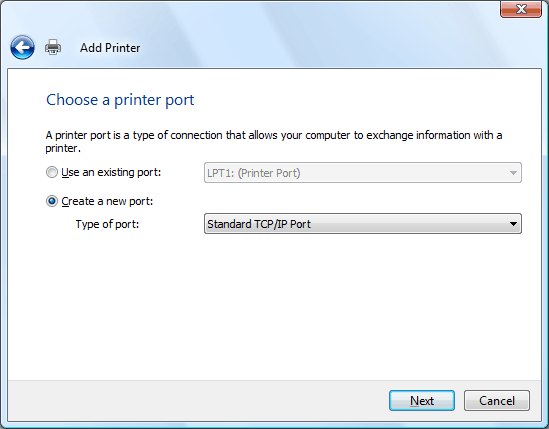
RESULT: The Choose a Printer Port step appears.

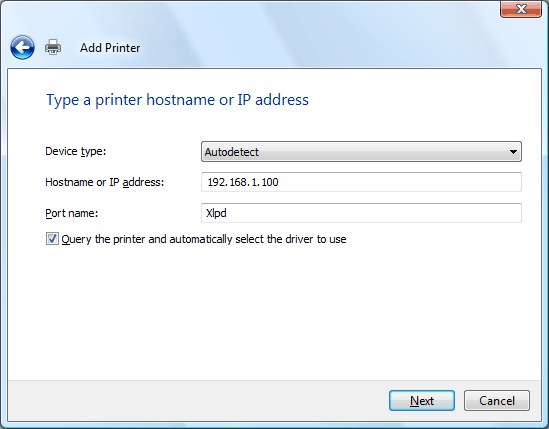
RESULT: The step of typing a printer hostname or IP address appears.

- In the Printer Name or IP Address box, enter the IP address or hostname of the PC where Xlpd is installed.
- In the Port Name box, enter any unique port name. You may use the name automatically created when the printer name or IP address is entered.
- Click Next.
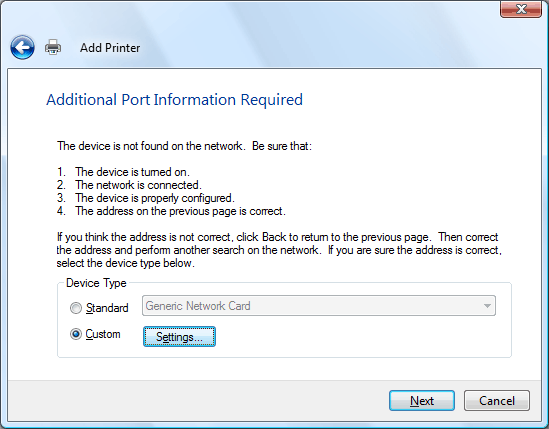
RESULT: The Additional Port Information Required step appears.


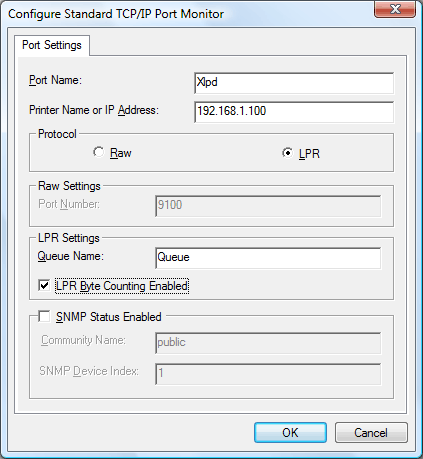
- In the Protocol area, select LPR.
- In the Queue Name box, enter the queue name of Xlpd. If this name is not already registered in Xlpd and a print job is sent to Xlpd using this queue, then Xlpd will print the job using its default queue or create a new queue automatically depending on the Xlpd settings.
- Select the LPR Byte Counting Enabled check box.
- Clear the SNMP Status Enabled check box.