


 Important: Important: |
|---|
| This is retired content. This content is outdated and is no longer being maintained. It is provided as a courtesy for individuals who are still using these technologies. This content may contain URLs that were valid when originally published, but now link to sites or pages that no longer exist. |
By Donna Tapella, Independent Consultant for Crimson Consulting
June 2009
 Summary
This case study documents the efforts and experiences of an iPhone application developer in porting the iPhone application Amplitude to a phone running Windows Mobile 6.5.
Applies To
Windows Mobile 6.5
Windows Mobile Software Development Environment
Getting started – Process Review and Setup
Introduction
Many iPhone developers are discovering the potential for new markets and significant revenue opportunities within the Windows Mobile environment and are wondering how to port their Apple applications to Windows ®phones.
This case study documents the efforts and experiences of an iPhone application developer in porting the iPhone application Amplitude to a phone running Windows Mobile 6.5. Based on his experience, it offers technical depth, code samples, useful links, observations, and tips to help accelerate porting projects. It is intended for developers who have written applications for the iPhone using the Objective-C language and would like to port their applications to Windows phones.
All opinions expressed are those of the developer and not necessarily those of Microsoft.
About the Developer
Luke Thompson is a software engineer who recently joined the Gripwire.com development team, led by Justin Arruda, Gripwire.com's lead software development engineer and Luke's former DigiPen classmate. Luke attends the DigiPen Institute of Technology and develops in many languages, including C/C++, C#, Objective-C, and several others. His application resume includes Gripwire’s BottleBlow and Pyramid Brewery for the iPhone, Amplitude for Windows phones, and Lock's Quest and Drawn to Life by THQ & 5TH Cell Media for Nintendo DS.
Gripwire.com
Gripwire.com is a mobile and social application development company located in Seattle, WA. Co-founded by MIT TR35 Innovator and former Amazon.com Mobile and Web Services Senior Manager Robert Frederick, Gripwire’s objective is to meet the gaming, graphics, and mobile access needs of users all over the world. Using the power of social media and friend networks, Gripwire is driving viral adoption and brand engagement, using their core platform to design, develop, and launch mobile solutions.
With five applications launched in the Apple App Store this year and seven more currently in review, Gripwire has been a strong advocate in developing portable software solutions on multiple platforms and devices. Earlier this year, Microsoft announced the availability of a mobile marketplace that will help make it easy for developers to manage and distribute their applications. Based on the excitement generated by the announcement, Gripwire decided to port one of its most popular applications, Amplitude, to Windows Mobile, thus opening their base to the millions of Windows phone users around the world.
About Amplitude
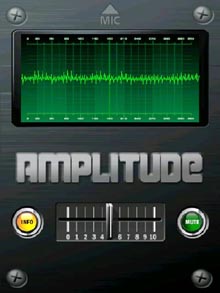
Amplitude is a fun application that enables users to amplify sound from their surroundings. With real-time graphical representation of sound picked up by the microphone, Amplitude users can adjust the volume/gain on their microphones to amplify sounds, such as animal heartbeats, environmental sounds, distant bird calls, tiny sounds from mechanical devices, and a host of other sounds that might otherwise go unnoticed.
Device Used
Gripwire used the HTC Touch Pro as the target mobile device. Development initially started with the HTC Touch Diamond 2, then switched because the HTC Touch Pro provides updated resolution specs to help support the display of audio. It also has increased hardware performance specs for testing code performance, and uses a more recent beta build of Windows Mobile 6.5.
The HTC Touch Pro (also known as the HTC Fuze for AT&T) includes 288 MB RAM and 512 MB ROM; with 480 x 640 pixels and a TFT resistive touch screen. In the current production release it runs Windows Mobile 6.1 Professional on a Qualcomm MSM 7201A 528 MHz processor.
An additional feature is a dongle that can plug into a standard headphone and does not require the use of an external microphone, which provides the headphone functionality that Amplitude requires.
Porting the Code
All code was developed entirely in C# because its managed language has superior memory management and many capabilities.
“What I’m finding is that it’s harder to mess up with C# than in Objective-C, which is used for iPhone application development. This makes any extra effort needed to customize the classes I want worthwhile,” commented Luke Thompson, Gripwire software engineer porting the Amplitude application.
Windows Mobile Software
Development Environment
Both Apple and Microsoft provide development environments, but there are important differences between the two.
- Windows Mobile developers can use C/C++ or C# programming
languages independently, while iPhone developers use Objective-C to
code, even with C/C++ DLLs.
- Windows Mobile developers can work almost exclusively within
Visual Studio. Visual Studio provides an environment that makes it
very easy to implement callbacks. Conversely, iPhone developers are
required to jump between numerous applications to perform the same
functions.
- Microsoft Developer Network (MSDN) licenses online libraries
for individual use. Rather than reinventing the wheel these
libraries help jump start the development effort.
The Microsoft Windows Development Environment includes:
- Development tools built into Visual Studio and .Net Compact
Framework.
- Windows Mobile SDK, which includes documentation, sample code,
header and library files, emulator images and tools for building
applications in Visual Studio.
- A huge developer community. With lots of information, blogs,
and sample code available, developers rarely need to reinvent the
wheel.
Although switching from a familiar development platform to a new one comes with challenges and a learning curve, the flexibility of the Microsoft environment means there is almost always a way to accomplish your objective with plenty of places to find help when needed.
Most of the code found on MSDN works in the Windows environment, but may not be supported in the Windows Mobile environment. Also, Windows Mobile examples are not always as complete as they are with the Windows environment. For instance, the code may provide an answer but may not show specifically how to implement the answer, or may be written for an earlier version of Windows Mobile. Such examples, however, are still helpful nonetheless.
Getting started – Process Review
and Setup
Because there is so much information available for Windows Mobile application development, iPhone application developers may find themselves asking, “Where do I start?” This case study documents Luke’s porting efforts and is intended to help familiarize you with the Windows Mobile development environment and assist you in setting up your developer machine.
Setup consisted of gaining familiarity with the Windows Mobile development environment, setting up the development system, and bringing over Amplitude’s assets. This required careful study and review of several foundation pages dedicated to developing and distributing Windows Mobile applications
If you are an iPhone developer, some of things you are accustomed to, like drag and drop, interface builder, and adding a PNG file to the project, might not be readily available; however, there are scores of blogs, websites, and code samples that can assist in problem resolution, making it possible.
Review Materials
In preparation for developing for Windows Mobile, familiarize yourself with the following:
-
Windows Live ID . A Live ID allows access to Microsoft webcasts, Virtual Labs, and other helpful mechanisms and information that can greatly speed up the Microsoft learning process.
 Note:
Note:Do not overlook the Virtual Labs. These 90-minute videos are particularly useful and a great way to learn the material. Along with step-by-step instructions, the labs provide the latitude for customizations and will save you time in the long run. The only drawback is that the code utilized cannot be downloaded from the Virtual Lab environment. However, many of the tutorials include downloads outside of the Virtual Lab environment, which allows you access the same material from your development machine. The videos are located at MSDN Virtual Labs . -
For Windows Mobile Developers . This is the complete sandbox with everything you need to develop and distribute an application. -
Getting Started with Windows Mobile Application Development . -
Windows Mobile Developer Center . This page proved to be a gold mine. It explains how to get started, develop, test, and release applications, and contains copious documentation, sample code, videos, webcasts, and the downloads necessary to actually do the stuff. -
Windows Mobile 6 Documentation . This useful link contains everything needed to develop applications for Windows Mobile 6 and explains the overall structure of the .NET Compact Framework for Windows Mobile 6.
Set up the Developer Machine
The following applications were used and needed to be obtained and installed separately.
- PC with Windows Vista and Windows Mobile Device Center. Windows
Mobile Device Center works with Windows Vista, and is required in
order to deploy applications to a Windows phone or to an emulator
Note:For Windows XP you will need to download and install the latest version of ActiveSync. This case study does not document this process. -
Visual Studio 2005 or 2008 – Professional. Visual Studio is the main program used to develop applications for Windows Mobile. The Visual Studio IDE allows developers to author, debug, emulate, design interfaces for, and package applications for delivery from one easy-to-use interface. Visual Studio contains a Visual Interface Designer, with a tool box of common device controls, containers, and other capabilities, and a device emulator for seeing what it should look like on the mobile device.
The Visual Studio 2005 Standard version will work for Windows Mobile, but the Visual Studio 2008 Standard Edition will not; use the Professional Edition.
Note:To speed development, have Visual Studio start the emulator and leave it running in the background. Because launching the Windows Mobile 6.5 emulator is slow, this will save 2–3 minutes of launch time. When you hit F5 or debug, Visual Studio will check if the emulator is running and if necessary auto-launch the emulator, pushing the updated bits to it. Important:When using some of the more advanced custom elements, Visual Studio Interface Designer cannot always be used to place objects on the screen. In these instances, developers will have to rely on their coding skills. This is comparable to the limitations of the Interface Builder within the iPhone SDK. - Visual Studio
.NET Compact Framework . Verify that the test device was shipped with the correct version of the Compact Framework. If not, use this link to easily download and install the correct one to the test device. -
Windows Mobile 6 Professional Software Development Kit . The SDK contains the API header and library files needed to access Windows Mobile functionality as well as documentation, sample application projects, and emulators used to deploy and debug applications even if you do not have a Windows phone.
Use the Professional SDK rather than the Standard. Luke noted that “initially there was some confusion about the specific differences between Professional and Standard. A little research revealed that Professional is geared for the touch phone while Standard is geared for the 9 pad phone.” -
Windows Mobile 6.5 Developer Toolkit . This is a critical toolkit for writing code for Windows Mobile 6.5, especially without an actual device. This toolkit provides Windows Mobile 6.5 emulator images as well as new sample code.
At this point, once the pertinent developer web sites have been reviewed, the relevant virtual labs have been completed, and development machine has been setup with the software, it is time to begin the port.
Graphics and Asset Layout
When thinking about the best way to approach the graphics and layout, it was also important to consider the requirements needed for sound visualization. The Amplitude graphics asset layout effort was tempered by the yet to be ported sound visualization features, which required some additional research before deciding on the best framework to use.

Choosing a Framework
After careful review of Graphics Device Interface (GDI) and DirectX documentation, it initially looked like DirectX was going to be the best methodology for implementing the oscilloscope feature of Amplitude. However, after extensive research into DirectX for rendering the oscilloscope lines, Luke decided to use the standard GDI instead and found that GDI was easier to use, and the DrawLine feature in DirectX was not as simple as in GDI.
GDI is a Microsoft Windows application programming interface and core operating system component responsible for representing graphical objects and transmitting them to output devices, such as monitors and printers. GDI is responsible for tasks such as drawing lines and curves, rendering fonts, and handling palettes. It is not directly responsible for drawing windows, menus, etc.; that task is reserved for the user subsystem, which resides in user32.dll and is built on top of GDI. GDI is similar to Macintosh's classic QuickDraw. Perhaps the most significant capability of GDI over more direct methods of accessing the hardware is its scaling capabilities and abstraction of target devices. Using GDI, it is very easy to draw on multiple devices, such as a screen and a printer, and expect proper reproduction in each case. This capability is at the center of all WYSIWYG applications for Microsoft Windows.
When preparing to lay out the graphics, it is important to remember that all layout and alignment code needs to be made device-independent. It is also important to take into consideration the screen resolution and then display the graphics accordingly. Also note that while the .NET Compact Framework infrastructure contains some built-in scaling functions that provide a fairly good display, avoid hard-coding button locations or any display of an item at a specific x-y location. Instead, a best practice is to add a mapping formula based on the screen resolution. This will provide better placement across different devices.
Background Operation
This is a requirement for all Windows Mobile applications. Specifically, the iPhone does not support running applications in the background, which means that anytime it is interrupted, it closes and must be reinitiated. However, continuous operation is a key feature with Amplitude on Windows phones. Although this involves additional effort for the iPhone application port and affects the design, you will need to build a table of all interrupts that could affect the application. Develop a table of interrupts for anything that may affect your application, and handle each individual case; for example, screen resize and screen loss.
Setting the Background Color to Transparent
The Amplitude interface required the ability to set BackColor to Transparent, which is not supported by the .NET Compact Framework. Searching for “transparent controls windows mobile” led to an alternate method, which was to extend some built-in graphics classes.
The MSDN
|
Note: |
|---|
| This is an example of a site that has some, but not all the
information needed to implement a solution. Looking at the MSDN
topic
|
|
Note: |
|---|
| Always check to see if there is an easy-to-use preexisting framework. These frameworks often perform quite well for the user. |
All PNG files were drawn with a transparent background, which is critical because almost everything done for the iPhone used PNG files. It uses the same function call as when writing jpg, bitmap, and other graphic formats. The iPhone class recognized it as a PNG, but adding this class extension assisted in the porting effort to Windows phones.
The example below shows that it is possible to add functionality to a framework. The functionality required was not present, so Luke added the test for stretch and for passing the appropriate parameters.
 Copy Code Copy Code
|
|
|---|---|
		protected override void OnRender(Graphics graphics)
		{
			if (this.image != null)
			{
				if (transparentBackground)
				{
					graphics.DrawImageTransparent(this.image,
this.Rectangle);
			}
				else if (alphaChannel)
				{
					if (!stretch)
					{

graphics.DrawImageAlphaChannel(this.imagingImage, this.Left,
this.Top);
				}
					else
					{

graphics.DrawImageAlphaChannel(this.imagingImage, this.Rectangle);
				}
			}
				else if (stretch)
				{
				graphics.DrawImage(this.image, this.Rectangle,
new Rectangle(0, 0, this.image.Width, this.image.Height),
GraphicsUnit.Pixel);
			}
|
|
 Caution: Caution: |
|---|
| When reviewing example code, something to watch for is that it is often written for the .NET Framework, not the .NET Compact Framework. The .NET Compact Framework is a subset of the full .NET Framework and does not contain the full functionality. |
Callback Message
The effort to implement a callback message in Visual Studio is minimal. The Interface Designer is fully integrated, which means never having to leave Visual Studio while working.
Luke commented, “The ease and speed of development was illustrated by putting together four different interface screens simultaneously. With Apple, this activity is really jumbled and you need to jump between numerous applications.”
The following shows some examples of callback messages:
|
Copy Code
|
|
|---|---|
		/// <summary>
		///
		/// </summary>
		/// <param name="sender"></param>
		/// <param name="e"></param>
		protected override void OnClosing(CancelEventArgs e)
		{
			SystemSettings.ScreenOrientation =
ScreenOrientation.Angle0;
			Stop();
			MainScreen.DoAnalytics(closeTag);
			base.OnClosing(e);
	}

		/// <summary>
		///
		/// </summary>
		/// <param name="sender"></param>
		/// <param name="e"></param>
		protected override void OnLostFocus(EventArgs e)
		{
			SystemSettings.ScreenOrientation =
ScreenOrientation.Angle0;
			base.OnLostFocus(e);
	}

		/// <summary>
		///
		/// </summary>
		/// <param name="sender"></param>
		/// <param name="e"></param>
		protected override void OnGotFocus(EventArgs e)
|
|
Alpha Blending
Another objective was to fully implement alpha blending, which is the process of combining an image with a background in order to create transparency and avoid the white bounding box around the image. This involved extending a class to add functionality to the library.
Luke initially used a site that showed how to handle PNG files as-is, but found that alpha blending required the execution of native code (C++) that writes the image only to the screen, leaving the background untouched (no white border). Although possible, this would have been a significant effort that would require many lines of code.
Written using C#, the MSDN UI Framework makes good use of extended classes, which facilitates the implementation of alpha blending. The process extends a number of built-in graphics classes, which allow built-in objects to be rendered with alpha channels and stretching.
All extension efforts were done with:
- GraphicsExtension class
- DrawImageAlphaChannel method
|
Copy Code
|
|
|---|---|
namespace Microsoft.Drawing
{
	public static class GraphicsExtension
	{

		/// <summary>
		/// Draws an image with transparency
		/// </summary>
		/// <param name="gx">Graphics to drawn
on.</param>
		/// <param name="image">Image to draw.</param>
		/// <param name="transparency">Transparency
constant</param>
		/// <param name="x">X location</param>
		/// <param name="y">Y location</param>


	public static void DrawImageAlphaChannel(this Graphics gx,
IImage image, int x, int y)
		{
			ImageInfo imageInfo = new ImageInfo();
			image.GetImageInfo(out imageInfo);
			Rectangle rc = new Rectangle(x, y, (int)imageInfo.Width
+ x, (int)imageInfo.Height + y);
			IntPtr hdc = gx.GetHdc();
			image.Draw(hdc, ref rc, IntPtr.Zero);
			gx.ReleaseHdc(hdc);
	}

	public static void DrawImageAlphaChannel(this Graphics gx,
IImage image, Rectangle dest)
		{
|
|
Resolving User Interface Issues
Understanding the GUI and implementing the Amplitude user interface involved reading, reviewing, and, where necessary, participating in the Virtual Labs at:
Screen Orientation
Because of the way the Amplitude application operates it is
necessary to rotate the interface by 180 degrees. The appropriate
sample code was found in the MSDN Library topic
Another big thing was to deal with users pulling out their keyboards. If there is a keyboard, the operating system tries to reorient the screen when the keyboard is pulled out. To mitigate this, Luke added a MainScreen_Resize routine. This straightforward code locks in screen orientation and provides a seamless experience for the user. The OnClosing, OnLostFocus, and OnGotFocus routines work exactly the way Luke intended. The OnResize routine is a corner case because Windows Mobile supports interaction with applications running in the background. Hence the need of a table of interrupts.
|
Caution: |
|---|
| The screen must be reoriented back to zero; otherwise the users will find that the application will be eternally upside down!! |
|
Copy Code
|
|
|---|---|
//Add Microsoft.WindowsCE.Forms reference to the project
// This is the MainScreen_Resize routine using
Microsoft.WindowsCE.Forms;
/// <summary>
		///
		/// </summary>
		/// <param name="sender"></param>
		/// <param name="e"></param>
		protected override void OnClosing(CancelEventArgs e)
		{
			SystemSettings.ScreenOrientation =
ScreenOrientation.Angle0;
			base.OnClosing(e);
	}

		/// <summary>
		///
		/// </summary>
		/// <param name="sender"></param>
		/// <param name="e"></param>
		protected override void OnLostFocus(EventArgs e)
		{
			SystemSettings.ScreenOrientation =
ScreenOrientation.Angle0;
			base.OnLostFocus(e);
	}

		/// <summary>
		///
		/// </summary>
		/// <param name="sender"></param>
		/// <param name="e"></param>
		protected override void OnGotFocus(EventArgs e)
		{
			SystemSettings.ScreenOrientation =
ScreenOrientation.Angle180;
			base.OnGotFocus(e);
	}

		/// <summary>
		///
		/// </summary>
|
|
Connecting to the Mobile
Device
Although the Windows Mobile emulator is a huge help during development, there is no substitute for having the device actually connected to Visual Studio to provide an exact representation of what the product will look like on the device itself. In this section, Luke connects the Windows phone to his development system, constructs and downloads the first build, and transitions to development utilizing a phone.
This is where Apple iPhone developers really notice another difference between iPhone and Windows Mobile development — there are far fewer obstacles with Microsoft. With Apple iPhone development, getting security certificates approved on the Apple development portal web site takes a couple of days, plus there are limitations, such as developers cannot install applications on general devices, only their own. However, since Microsoft encourages development, the process is straightforward, and between Visual Studio and the SDK, developers do not run into the same limitations.
Setup, Basic Framework, and First Build
- Set up the software on Visual Studio 2008.
- Get the signature on the phone
- Visual Studio 2008 and Windows Mobile 6 SDK ship with proper
certificates that are installed on the local drive: for example
C:\program files\Windows Mobile 6 SDK\Tools\Security\SDK
Development Certificates\Certs.cab
- Installation requires connecting the Windows phone via a USB
cable to the development computer, then copying Certs.cab from the
local location to the phone.
- Once loaded onto the mobile device, open the CAB on the phone
and install it so that the cab is running from the phone.
Note:the phone will repeatedly display “Are you sure?” during this process. Be sure to respond “yes” each time. - For connection problems, see “Troubleshooting the ‘Connection
Failed’ Message”, below.
- Visual Studio 2008 and Windows Mobile 6 SDK ship with proper
certificates that are installed on the local drive: for example
C:\program files\Windows Mobile 6 SDK\Tools\Security\SDK
Development Certificates\Certs.cab
- Create a C# Smart Device Project using Device Application for
.NET Compact Framework Version 3.5, with the target platform being
the Windows Mobile 6 Professional SDK.
- Next, create a Smart Device CAB Project using the above project
Primary Output as the input. This is very straightforward, nothing
painful.
- After the Certs.cab is appropriately installed to the
development device, initiate the connection to the device from
Visual Studio 2008. This will automatically install a number of
additional debugging tools.
As a developer, you may need to provide additional verification to install these tools on the phone. Visual Studio will automatically trigger the installation once you hit F5 or debug.
At this point the mobile device is connected to the development machine. Porting the Amplitude code includes taking the following steps:
- Tackle microphone and audio connectivity to the application.
Note:Remember that .Net Compact Framework is a limited version of.NET Framework. There is a tendency to want to use .NET Framework features that are not in the .NET Compact Framework. For instance, DirectSound is not supported on Windows phones. - Look at graphics, libraries and other tools available to
reproduce and extend Amplitude functionality.
- Create all screens.
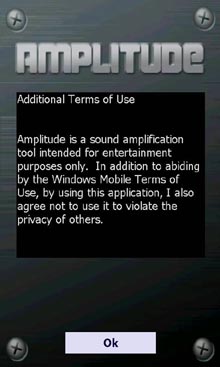
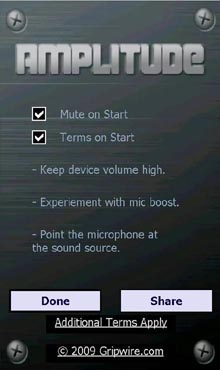
For Amplitude, these included the Main screen, Info screen, and Additional Terms screen. - Convert icon.png to appropriate icon.ico file.
- Complete the Basic Framework
Luke created, built, and ran an advanced hello-world application to serve as the initial framework for developing the Amplitude interface and accessing the audio code more rapidly.
With the basic interface roughed-in, Luke initially observed screen size and resolution issues, such as the emulator using a resolution different from the target device. The emulator showed 240x320 but the Windows phone had a resolution of 480x800. However, scaling based on screen resolution can be easily specified in the properties of the window form.
First Application Build
Once the framework is complete, the first build of the application can be installed on the device. When the first build of the Amplitude application was installed on the HTC device, Luke was unable to get the application to work because, as noted earlier, the device shipped with an earlier version of the .NET Compact Framework.
Once the correct version of .NET Compact Framework, (in this case version 3.5), was downloaded from the Microsoft site and installed, Amplitude successfully ran on the device, but the images required a little work.
Troubleshooting the “Connection Failed” Message
A failure message will appear if the Visual Studio certificate did not get installed. While initially configuring the mobile device to work with Visual Studio, a “Connection Failed” message was received, but Luke searched the MSDN Windows Mobile Developer Center and quickly found the certificate information he needed.
|
Note: |
|---|
| Although the following MSDN links contain dated material for Windows Mobile Version 5.0, the links correctly illustrate the appropriate certificates to install on Windows Mobile 6 devices. |
Coordinating the Device with Visual Studio 2008
At this point the phone is set up to coordinate with Visual Studio 2008, and development proceeds on the phone itself. Upon connecting to the phone, Luke ran into and fixed a number of bugs; the most notable ones are listed below.
- The layout code was adjusted to adapt to the different
resolutions and differences in aspect ratios. Automatic scaling was
utilized so the layout was a bit stretched vertically. There were
some anchor points for the controls, which tried to keep some of
the controls locked in place relative to the screen size. These are
accessed via the Interface Designer inside of Visual Studio.
- Found several bugs in the CAB installation. These consisted of
everything from Start Menu shortcuts to various field properties of
the app so that Add/Remove Programs identified Amplitude as
“Gripwire.com’s Amplitude” rather than “Default Company Name’s
Gripwire.com”.
But kudos to Microsoft! When it came time to switch devices it was extremely easy to do in the Visual Studio environment. All that it required was to install the Certs.cab. When compared to iPhone development, this was much simpler to accomplish.
Audio and Sound
Manipulation
Online searches and documentation for audio and sound greatly assisted in the porting efforts and are good reference points for customizing requirements. Many of the samples have been successfully compiled on Windows Mobile. Audio development followed three basic phases:
- Researching and utilizing information gathered from online
searches, notably CodeProject.com
- Discovering and resolving serious latency challenges
- Optimizing audio performance
Luke used the emulator to make sure the application was rendering correctly, and then moved the audio development to the actual phone to minimize emulation problems with audio.
waveIn and waveOut
Luke used the waveIn and waveOut APIs in C# through P/Invoke to capture an audio signal from the sound card’s input and play it back at (almost) the same time.
Special thanks to developer Ianier Munoz for the sample code in
his Code Project article
Reducing Latency
Working in debug mode in Visual Studio allows you to pause, jump into a method, view variable values, and more; however, these features come at the price of performance. Luke found that by switching from debug to release mode, then removing any residual debug information from release mode, the latency was reduced by a significant factor.
|
Important: |
|---|
| Run in release mode, not debug mode, especially when working with an application that requires near real-time performance. |
The Code Project – CodeProject.com
The Code Project is a community library website that provides
articles like
Part of this Code Project sample shows how to add in-place audio effects, which worked fairly well. Most of the issues encountered when utilizing it were primarily about latency and related to debug information and determining what the hardware could handle.
To adjust for device characteristics and further improve audio performance, changing the audio format from 16 bit to 8 bit reduced the large amount of data being pushed through the audio buffers, which, in turn, reduced latency; Also, dropping the sampling frequency from 44.1 KHz to 16 KHz (16000 Hertz) kept the .NET Compact Framework Garbage Collector from being thrashed.
|
Note: |
|---|
| Most Mobile 6.1 users experience very good results with 16000 Hertz and higher. Developers can expect to spend about a day attempting to get latency below 250 milliseconds. The preferable rate is 25-50 milliseconds. |
Using the following code snippet, the audio capture works well and gets great response.
|
Copy Code
|
|
|---|---|
m_Format = new WaveLib.WaveFormat(16000, 8, 1); bufferSize = m_Format.nAvgBytesPerSec / 8; |
|
At this point the audio is a full duplex audio stream that comes in on the microphone and is pushed out over the stereo, speaker, and headphone buffer.
|
Note: |
|---|
| All code on Code Project is licensed per the publishing author’s decision. Coordination with the publishing developer is critical! |
Implement Volume Slider
While Luke found that rendering sound wave code was slow, thus requiring further optimization, he found that the audio was good and was implemented and made functional the volume slider. To implement the audio volume slider required calls to a native routine to adjust the audio playback channel via the hardware. A small software routine was also executed for amplification. Both yielded very good results.

Audio Latency Adjustment
A key goal was that rendering sound waves could not unduly affect the audio playback, and the frequency was further adjusted to 8000 Hertz to reduce latency. At 8000 Hertz developers can expect latency of a half second or less, which is comparable to Apple.
Windows Mobile, C#, and especially the .NET framework are all known for being slow. What is really needed is real-time audio and almost real-time rendering of sound waves. See “Polish and Cleanup”, below, for additional information.
Cycling Audio Buffers
CycleBuffers are where the audio data (the byte array) is cycled for placement on the screen. Note in the sample code below that an optimization was inserted removing a divide by 8 with a shift operation. This greatly improved performance. The x right shift was not optimized because size was not strictly a multiple of two.
Some points about cycling audio buffers:
- During the audio loop, you need to cycle line buffers to have
the wave line proceed from right to left.
- The effort to convert an audio wave to a line already existed
with the current iPhone application, and porting that completed
code to Windows phones was not a problem.
- CycleBuffers routine is called every time new data comes from
the recorder or sound buffer.
- If the oscillating frame (OSC frame) is not null, there are
some sync issues – sound starts before \
- Rendering from right to left; fill up line buffer 1;
|
Copy Code
|
|
|---|---|
private void CycleBuffers(byte[] data, int size)
		{
			if (oscFrame != null)
			{
				int x = 0;
				int y = 0;
				int maxI = size / lineBuffermod;

				for (int i = 0; i < maxI; ++i)
				{
					//divide by size is same as right-shift size/8
					//x = (int)(((i * 10) / (size * -1.0)) *
oscFrame.Width) + oscFrame.Width + oscFrame.Left;
					x = (int)(((i * lineBuffermod) / (size * -1.0))
* oscFrame.Width) + oscFrame.Width + oscFrame.Left;
					//divide by 256 is same as right-shift 8
					//y = (int)((data[i * 10] / 256.0) *
oscFrame.Height) + oscFrame.Top;
					y = (int)((data[i * lineBuffermod] *
oscFrame.Height) >> 8) + oscFrame.Top;

					lineBuffer1[i].X = x;
					lineBuffer1[i].Y = y;
			}
		}
	}
|
|
Animation and
Visualization
Dynamic Layout Code
The Dynamic Layout Code is a corner case extension. Amplitude utilizes the MSDN UI Framework which was further extended to allow for an image with an alpha channel to be drawn stretched as well as with alpha. The way the MSDN UI Framework was originally written, it would only draw alpha or it would only draw stretch, but it would not draw alpha stretched. This caused rendering problems, but a simple code enhancement fixed the problem:
|
Copy Code
|
|
|---|---|
protected override void OnRender(Graphics graphics)
		{
			if (this.image != null)
			{
				if (transparentBackground)
				{
					graphics.DrawImageTransparent(this.image,
this.Rectangle);
			}
				else if (alphaChannel)
				{
					if (!stretch)
					{

graphics.DrawImageAlphaChannel(this.imagingImage, this.Left,
this.Top);
				}
					else
					{

graphics.DrawImageAlphaChannel(this.imagingImage, this.Rectangle);
				}
			}
				else if (stretch)
				{
					graphics.DrawImage(this.image, this.Rectangle,
new Rectangle(0, 0, this.image.Width, this.image.Height),
GraphicsUnit.Pixel);
			}
|
|
Size and Screen Resolution
Although Visual Studio can automatically handle most of the many types of devices, with different screen aspects and various resolutions, that developers run into, the following is an example of generating size of controls based on screen resolution using an ImageElement object, which is an MSDN UI Framework object. You do need to specify if there is an alpha channel , the source, and other properties.
As a general level routine, specify the alpha channel and source, as well as the width, height, left, and top. To make the screen as big as possible, set the image to .9 (which is essentially 90%), then specify 65.0/288.0 (which are the aspect ratios of the height to width). By starting the image at .05 (5%), the image is centered (5% on the left and on the right, because the image is 90% of the width of the resolution).Then, once rendered, it appears as though the image was made specifically for the device.
|
Note: |
|---|
| The Emulator doesn’t support all aspects and resolutions, which means that you will still need to test as many different resolutions as possible. Testing a number of different Emulator resolutions should be adequate for the bulk of devices on the market. |
|
Copy Code
|
|
|---|---|
// Anchor points are an entirely different concept than what is being portrayed here. logoImage = new ImageElement(); logoImage.AlphaChannel = true; logoImage.Source = @"Resources\\amplitude-logo.png"; logoImage.Stretch = true; logoImage.Width = (int)(.9 * System.Windows.Forms.Screen.PrimaryScreen.Bounds.Width); logoImage.Height = (int)(65.0 / 288.0 * logoImage.Width); logoImage.Left = (int)(.05 * System.Windows.Forms.Screen.PrimaryScreen.Bounds.Width); logoImage.Top = (int)(System.Windows.Forms.Screen.PrimaryScreen.Bounds.Height * .45); this.Canvas.Children.Add(logoImage); |
|
|
Note: |
|---|
| Luke ran into an issue with hardware variations in the end device. The expectation was that the application would run on both devices; however, the latter Windows Mobile release on the HTC Touch Pro was a significant improvement over the HTC Touch Diamond 2. Most other issues with similar devices centered on the display and required that all layout and alignment code be changed to be device independent and take into consideration the screen resolution. Once this was set, the device displayed the layout accordingly. The expectation is that this should translate quite nicely between different devices. |
Exiting the Application
As the application closes down, the screen needs to be oriented in the appropriate direction on close. Because the user has the ability to force-kill the app via the Task Manager which is different from the developer’s coded paths. Developers need to intercept the closing to accommodate this and reorient the screen and call stop.
Polish and Clean up
In order to achieve the appropriate performance customers expected, the last phase of the project was to focus on optimizations and further reduce latency.
Memory
It is particularly important to the Amplitude application to reuse memory whenever possible. Also, by limiting boxing the developer can gain a slight performance increase.
Optimization
Although performance in C# can be slow, the Visual C# Kicks page
- Minimize constructors.
Since construction in C# can be slow, a best practice is to reuse objects whenever possible. - Use a shift operator to minimize division.
Copy Code
y = (int)((data[i * 10] / 256.0) * oscFrame.Height) + oscFrame.Top;
y = (int)((data[i * lineBuffermod] * oscFrame.Height) >> 8) +
oscFrame.Top;
- Minimize boxing objects.
For example, replace ArrayList with List
Copy Code
//private ArrayList m_Blocks = new ArrayList();
private List<Byte[]> m_Blocks = new List<Byte[]>();
- Use standard real-time optimizations.
- Optimize inner loops
- Cut down on your data-points during calculations. For example,
the application has a wave file being sampled at 16000 Hz that
produces 16000 potential data points to be rendered to the
oscilloscope. Instead, handling only 640 of those data points
allowed very fast rendering of every audio frame.
Amplitude oscilloscope
- Optimize inner loops
Conclusion
Porting an iPhone application proved both surprising and not nearly as challenging as had been expected. Once the frameworks and library decisions were finalized, the effort to port code essentially consisted of moving Objective C to C#, both of which are Java-like languages.
The large development community, both within Microsoft and outside, and the various whitepapers, blogs, virtual labs, websites, and other online documentation, offered a wealth of information that provided direction and greatly facilitated problem resolution. The only real challenge was assuring total portability between screens, and that was assured by utilizing the concept of aspect ratios.
Now that Amplitude has been ported, Gripwire has an application that runs on a wide variety of devices that run the Windows Mobile 6.5 operating system and can reach a larger number of users.
By porting their applications to Windows phones, iPhone developers can potentially increase revenue and connect directly to millions of Windows phone users that are looking for applications for their phones.
Share Button Code
The Share Button code is special because it pre-populates an e-mail with text links back to the Amplitude website. Alternatively, a pre-populated text message could have been used instead, but the iPhone App was using e-mail to share.
|
Copy Code
|
|
|---|---|
private void btnShare_Click(object sender, EventArgs e)
{
  string eTo = "";
  string eSubject = "";
  string eBody = "";
  ProcessStartInfo psi = new ProcessStartInfo();
  eTo = "mailto:" + "";
  eSubject = "?subject=" + "Check out the Amplitude Windows Mobile
App";
  eBody = "&body=" + "Click this link to check out this new app
for your	Windows Mobile phone: \n\n
http://www.Gripwire.com/amplitude/share";
  psi.FileName = "\\Windows\\tmail.exe";
  psi.UseShellExecute = false;
  psi.Arguments = eTo + eSubject + eBody; Process.Start(psi);
}
|
|
Similarly, a developer could launch Internet Explorer with a specific URL:
|
Copy Code
|
|
|---|---|
private void lnkWebLink_Click(object sender, EventArgs e)
{
	Process.Start("IExplore.exe",
"http//www.Gripwire.com/amplitude");
|
|
Registry
Below is an example of a simple, straightforward way to store a value in the registry. The registry acts as a central repository of information for the operating system and the applications on a computer. The registry is organized in a hierarchical format, based on a logical ordering of the elements stored within it. When storing information in the registry, select the appropriate location based on the type of information being stored.
Be sure to avoid destroying information created by other applications, because this can cause those applications to exhibit unexpected behavior, and can also have an adverse effect upon your own application.
Amplitude uses a couple of registry keys. Below is an example of MuteOnStart.
For base-level items in this hierarchy see the MSDN Library
topic
|
Copy Code
|
|
|---|---|
public bool MuteRegistry
{
   get
  {
	RegistryKey ourKey = Registry.CurrentUser;
	ourKey.OpenSubKey("Amplitude", false);
	int val = (int)ourKey.GetValue("MuteOnStart", 1);
	if (val != 0)
	val = 1;
	if (val == 1)
	return true;
	return false;
  }
  set
  {
	RegistryKey ourKey = Registry.CurrentUser;
	ourKey.OpenSubKey("Amplitude", false);
	ourKey.SetValue("MuteOnStart", (value ? 1 : 0) );
  }
}
|
|
Analytics – Device Unique Identifiers
In order to monitor and track usage, every Gripwire application constructs an anonymous unique number that is seeded for every device. From the phone, this code accesses a certain web page that includes a specific path in the URL.
The big deal was getting the device ID, because the device ID is unique to every single phone. It is also anonymous: there is not a repository of device IDs. The device ID being used in Amplitude is more anonymous because it is being hashed with the application ID. (This is the method where GetDeviceID is passed in an ApplicationID. Then that routine calls out to the external native code DLL and then hashes the actual DeviceID with the supplied ApplicationID.) This is transparent to the developer and never actually gets the true DeviceID, but gets a uniquely hashed value of it. The following code demonstrates how these analytics are formed.
|
Note: |
|---|
| This version contains a bogus application ID and base URL. |
|
Copy Code
|
|
|---|---|
private string launchTag = "launchingApplication";
private string mutePressedTag = "mutePressed";
private string infoPressedTag = "infoPressed";
private string closeTag = "closingApplication";

static string analyticsUrl
{
get
{
string baseURL = "http://www.zanyanalyticsengine.com/?";
return baseURL + "&" + appIDTag + "&" + deviceIDTag;
}
}

static string appID
{
get
{
return "ApplicationID1234";
}
}
static string appIDTag
{
get
{
return "appId=" + appID;
}
}
static string deviceID
{
get
{
byte[] buffer = GetDeviceID(appID);
StringBuilder sb = new StringBuilder();
for (int x = 0; x < buffer.Length; x++)
{
sb.Append(string.Format("{0:x2}", buffer[x]));
}
return sb.ToString();
}
}
static string deviceIDTag
{
get
{
return "deviceId=" + deviceID;
}
}

static public bool DoAnalytics(string id)
{
try
{
string link = analyticsUrl + "&" + "tag=" + id;
WebRequest req = WebRequest.Create(link);
WebResponse res = req.GetResponse();
}
catch (Exception e)
{
//if anything breaks - catch and return false;
return false;
}
return true;
}

/*
HRESULT GetDeviceUniqueID(
  LPBYTE pbApplicationData,
  DWORD cbApplictionData,
  DWORD dwDeviceIDVersion,
  LPBYTE pbDeviceIDOutput,
  DWORD* pcbDeviceIDOutput
);
*/
[DllImport("coredll.dll")]
private extern static int GetDeviceUniqueID([In, Out] byte[]
appdata,
int cbApplictionData,
int dwDeviceIDVersion,
[In, Out] byte[] deviceIDOuput,
out uint pcbDeviceIDOutput);

static private byte[] GetDeviceID(string AppString)
{
// Call the GetDeviceUniqueID
byte[] AppData = new byte[AppString.Length];
for (int count = 0; count < AppString.Length; count++)
{
AppData[count] = (byte)AppString[count];
}
int appDataSize = AppData.Length;

byte[] DeviceOutput = new byte[20];

uint SizeOut = 20;
GetDeviceUniqueID(AppData, appDataSize, 1, DeviceOutput, out
SizeOut);

return DeviceOutput;
}
|
|