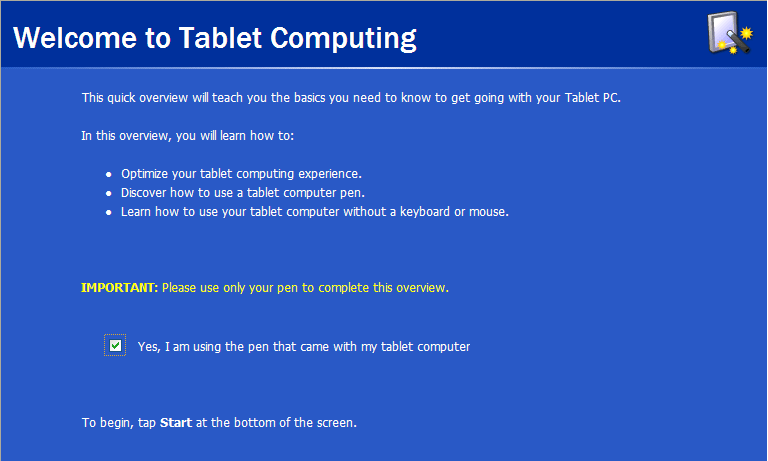
When you power up your new tablet for the first time, you’ll see the Welcome To Tablet Computing tutorial, shown in Figure 1-1, designed to give you the basics of using your tablet’s unique features. Take a few minutes to go through at least the first six screens, which give you practice using the pen in place of a mouse. Without this practice, your first hour with your tablet will be very frustrating. After the practice section, the next seven screens give you an overview of inputting text using the pen, but there are no opportunities to practice and subsequent tutorials do a much more thorough job on this anyway. Skim through them if you wish, and quit the program. We will cover using the pen to input text in depth in Chapter 2. The most important thing to practice now is using your pen in place of a mouse, particularly pointing the cursor, single-tapping, double-tapping, and right-tapping.
To tap is the pen equivalent of a click. Where you would click with a mouse button, you tap with your pen.
The Welcome To Tablet Computing tutorial should be done with your screen in portrait orientation (longer than it is wide) and with the pen as primary input. If your tablet does not have an attached keyboard, it should start up this way. If your tablet can also function as a laptop, it will probably start in landscape screen orientation and with the keyboard and touch pad accessible for input.
The exact process to stow or remove your keyboard and otherwise reconfigure your tablet varies, so you’ll need to check your owner’s manual. Switching the screen orientation is part of Windows XP Tablet PC Edition and can be done three different ways. Switching the screen is something you might do several times during the day, so you should understand all three.
- Use the Tablet And Pen Settings control
panel
Finding a control panel in Windows XP can be a little confusing until you learn what category the control you are looking for fits into. Tap the Start button and tap Control Panel. Tap the Printers And Other Hardware category, and then tap Tablet And Pen Settings. Tap the Display tab and select the orientation you want as shown in Figure 1-2. Because a tablet can be used with any side of the screen as the bottom, there are four possibilities for screen orientation: primary portrait, secondary portrait, primary landscape, and secondary landscape. The labels primary and secondary are arbitrary. Secondary landscape is simply primary landscape rotated 180 degrees. If you switched from primary landscape to secondary landscape while the tablet was still set up like a laptop, you would be looking at the screen upside-down. Similarly, secondary portrait is a 180-degree rotation of primary portrait. Once you select the portrait orientation you prefer for your tablet, tap Apply, and the screen will change.
 Figure 1-2. The Tablet And Pen Settings control panel lets you select one of four screen orientations.
 - Use the Change Tablet And Pen Settings
icon in the notification area
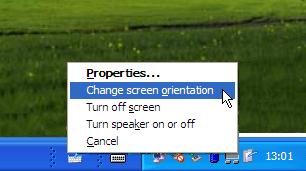
This is a faster way to switch the screen orientation. Single-tap or right-tap on the Change Tablet And Pen Settings
icon and select Change Screen Orientation from the shortcut menu shown in Figure 1-3. The screen will switch to the next of the four possible orientations set in the control panel. Continue to switch until you see the screen orientation you want. If you don’t want to use all four possible screen orientations regularly, go to the Display tab in the Tablet And Pen Settings control panel and tap the Change button next to Sequence. Select the orientations you want in the order you want them to appear and set the remaining options to (None). If you have only two options chosen, as most people will, the Change Screen Orientation command will toggle between those two.
Change Tablet And Pen Settings also lets you quickly toggle the speaker on and off (handy if you don’t want to bother your neighbor on the airplane) and turn the screen off to save battery power. The Properties item takes you directly to the Tablet And Pen settings control panel.
- Use the hardware buttons, if
available
This is fastest way to switch the screen orientation, but not all tablets have these buttons. If your tablet has hardware buttons, there will be a Tablet Buttons tab in the Tablet And Pen Settings control panel. This tab allows you to assign any number of functions or keystrokes to buttons on the face of the tablet. Often, Change Screen Orientation will be set as the default for one of the buttons. As with Change Screen Orientation on Change Tablet And Pen Settings, the hardware button scrolls through all the available screen orientations as set in the Tablet And Pen Settings control panel.
The primary landscape orientation usually puts the hardware buttons near the user’s right hand. Left-handed users can switch this by activating the secondary portrait orientation instead of the primary one.
Until using your pen instead of a mouse is second nature, you can’t really enjoy your tablet. One fundamental skill is moving the cursor. The pen should not make contact with the screen if you only want to move the cursor. In fact, as soon as the pen gets close enough to the screen, the cursor will jump to the pen’s position, so you rarely need to move the cursor around the screen as you did with a mouse. Just to get a feel for the pen, though, try moving the cursor to various items on the screen, such as the Start menu, and hovering in place until the ToolTip comment appears.
To hover with your pen is to bring your pen close enough to the screen to move the cursor but not actually touch the screen. Hovering allows you to control the cursor without the risk of an accidental tap or drag.
When the pen does make contact with the screen, that is the equivalent of a click with the left mouse button, so you must make contact to tap (click) or drag. The key to a good tap or drag is tapping hard enough for the screen to register the contact but not pressing down excessively. This comes quickly with a little hands-on experience. As you practice, here are some tips for successful mousing with a pen and the logic behind them.
- Rest your hand on the screen
This is counter-intuitive to anyone who has used a Palm Pilot or a Pocket PC, where the screen is touch-sensitive. Because it’s the pen of the tablet that is sensitive, not the screen, you can rest your hand with no adverse effects. It is much more comfortable and easy to use the pen if you rest your hand.
Clean your screen often. When you rest your hand on the screen it gets dirty quite quickly. Many office supply outlets and computer stores sell anti-static wipes for cleaning computer monitors that work very well.
- Hold the pen like a regular pen
Resist the urge to hold the pen like a pointer. However you hold a real pen is the way to hold the tablet pen.
- Press firmly and tap with gusto
The screen on your tablet is built for writing. You can’t break it with the pen. Press firmly when you write and tap with a hard, short whack. As you get used to the tablet, press and tap with less pressure until you find the amount that works best for you.
- Watch the cursor, not the pen
Particularly, watch the point of the cursor arrow. The alignment between the pen tip and the cursor is good but not perfect. If you tap an icon and nothing happens, the most likely cause is that the pen is over the icon, but the cursor is a bit off. It’s the position of the cursor on the screen, not the pen, that ultimately matters to the computer.
- Get a better pen
If your tablet came with a small stylus instead of a full-size pen, invest in a more comfortable pen. The more comfortable the pen, the easier it is to use. I’ve also noticed that some pens seem to have better cursor alignment than others. If you aren’t happy with your pen, try others until you find one that works well for you. Make sure you get a pen that works with your particular tablet. See the sidebar on “How the Pen Works” for more information.
If you’re having continued trouble getting your pen to work and you already tried tapping harder, try holding the pen more upright. This will improve the alignment between the pen tip and the cursor. Sometimes, when the pen is at a serious angle, the cursor is off to one side, almost as if it is a “shadow” cast by the pen. Also, the tip of the pen must compress slightly to send a signal. If the pen is held at too much of an angle, the tip will slide over the screen rather than compress.
Research shows only about 30% of Windows users ever use their right mouse button. This is too bad, since a right-click gives you instant access to context-sensitive shortcut menus full of useful commands. On a tablet, these menus save perhaps even more time and effort, so you should definitely know how to right-tap and right-drag. To get a good right-tap, hold the pen down longer until the right-tap icon appears and then lift the pen completely off the screen. Next highlight the desired item on the shortcut menu while hovering. Finally, tap the selected menu item.
It’s very easy to accidentally select the wrong item on a shortcut menu if you keep the pen in contact with the screen after the shortcut menu appears.
Pens with a button for a right-tap make the process quicker and easier. To right-tap with a pen button, hold the pen button down before you make contact with the screen, tap the point where you want to right-tap, and lift the pen back off the screen before releasing the pen button. The right-tap menu will appear where you tapped. The pen button is also the only easy way to right-drag on a tablet, such as you might do when you wanted to move a file from one folder to another rather than copying it. To right-drag, hold the pen button down before you make contact with the screen, press down and drag the item you want to move. Lift the pen off the screen before you release the pen button, and the shortcut menu will appear over the icon you just dragged. The disadvantage to using the pen button is that if you move the pen laterally too much as you right tap, you can accidentally right-drag and get the wrong shortcut menu. If this happens, tap anywhere on the screen other than the menu. If it happens to you often, try changing the pen tolerances in the Tablet And Pen Settings control panel.
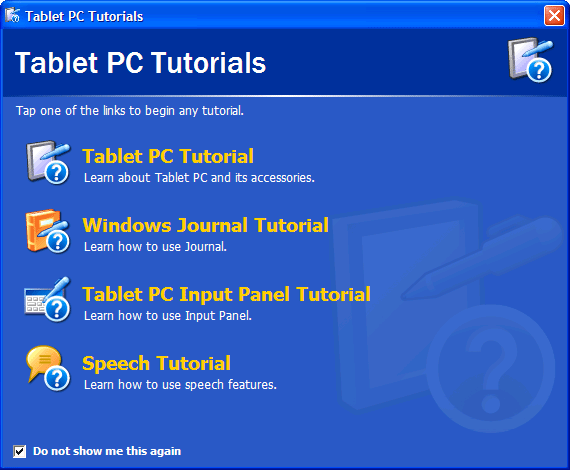
The Welcome To Tablet Computing tutorial only launches the first time you use your tablet. There are four more built-in tutorials that provide an overview of tablet computing and introductions to Input Panel, Windows Journal, and Speech input. The tutorial home, shown in Figure 1-4, will appear every time you start up your tablet until you tell them to go away by checking Do Not Show Me This Again. If you want to run the tutorials after you check this box, go to the Start menu, tap All Programs, tap the Tablet PC folder, and tap Tablet PC Tutorials. We will cover Input Panel and Speech input in Chapter 2 and explore Windows Journal in Chapters 3 through 5. Some basic use of Input Panel is necessary to simply get going on the tablet, so, if you haven’t done so already, view the video portions of Tablet PC Tutorial and Tablet PC Input Panel Tutorial. Ideally, do the exercises as well.
The key items to take away from these tutorials are:
-
Use your pen instead of a mouse.
-
Use Input Panel on a tablet where you would have used a keyboard to enter text on a standard computer. You may use script or printing, but use upper and lower case and write using the line as a guide.
-
Open Input Panel using the icon on the taskbar. Close it when you’re not using it if you need more screen space.
-
Tap once in the spot you want the type to appear before you start writing in Input Panel.
-
To enter text using your handwriting, tap the Writing Pad tab on the lower left of Input Panel. Correct the text using the onscreen keys to the right of the writing area for cursor control and deleting mistakes.
-
If you get frustrated with the writing pad, switch to the Input Panel keyboard by tapping the Keyboard tab on the lower left of Input Panel.
That’s enough to give you rudimentary text input with the pen. If you just can’t wait to find out more, go ahead and skip to Chapter 2 and come back here once you’re an Input Panel expert. If you want to put off using Input Panel entirely for a while and you have a USB keyboard, simply plug it into tablet and use a standard keyboard instead.
Many of the peripherals on your tablet will use the Universal Serial Bus (USB). USB is easy to use, but there are a few things to be aware of. See Appendix A, Troubleshooting, if you are having trouble with USB peripherals.