|
|
< Day Day Up > |
|
Occasionally it might be necessary to remove a software application from the client computers after it has been installed. This might be due to configuration issues or because the application was rolled out to a group of clients that shouldn’t have received it. Whatever the reason, at some point you’ll likely be faced with the task of uninstalling an application.
In most applications today, the Setup program is used to perform the deinstallation as well as the installation of the application. The biggest problem administrators encounter with these types of uninstall routines is that they usually don’t remove everything that was installed with the application. It isn’t uncommon to have an uninstall routine leave behind directories, abandoned files, and even unwanted registry entries. This isn’t necessarily the application’s fault. Install programs are usually not written to keep track of what is or isn’t installed.
SMS Installer has both an uninstall and a rollback feature to help alleviate these types of problems. Recall that SMS doesn’t actually perform the application’s install routine on the target computer. Instead, the Repackage Installation Wizard performs a before-and-after scan of the reference computer and creates a script that defines what should be modified on the target computers. Uninstall and rollback support help to restore the reference computer to the condition it was in before an SMS Installer–generated executable file made any modifications to the system by logging what the script did. Uninstall support is designed for complete removal of an application, including its files, registry modifications, and so on. Rollback support is designed more as a restoration tool—to restore any replaced files and any changed registry entries, such as removing a patch that was applied to an application.
Enabling uninstall support came up in our discussion of modifying the script from Installation Expert earlier in this chapter. Let’s recap here. To enable uninstall support, you must configure it from the Installation Expert prior to compiling your Installer executable file. To do so, follow these steps:
Select the Runtime Support installation attribute in the Installation Expert interface.
In the Summary Information For Runtime Support section, click Runtime Options and then click Properties to display the Runtime Support dialog box, shown previously in Figure 14.23.
In the Options tab, verify that Uninstall Support is selected—which it should be by default.
Click OK. Uninstall.exe will be included in the installation package and copied to the client computer during the package execution, and an uninstall log file will be maintained on the target computers.
Enabling rollback support requires one additional change to the process used to enable uninstall support. To properly restore settings and files, those settings and files must be saved somewhere during the installation of the software package. SMS Installer’s trick for rolling back a file such as a patch is to copy the original to a backup location before performing any modifications. To accomplish this, you must specify the backup directory into which to save replaced files.
We also touched on enabling rollback support when we discussed modifying installation scripts using the Installation Expert. To enable rollback support, follow these steps:
In the Installation Expert interface, select the Installation Interface installation attribute.
In the Summary Information For Installation Interface section, click Wizard Dialogs and then click Properties to display the Dialogs tab of the Installation Interface dialog box, shown previously in Figure 14.18.
In the Dialogs tab, select Backup Replaced Files. Selecting this option will cause two dialog boxes to be displayed to the user during the SMS Installer executable file execution. The first prompts the user to specify whether to back up the files. The second prompts for the location of the backup files.
If rollback support is required but your intention is to provide an unattended installation script with dialog boxes suppressed, you need to manually edit the Set Variable DOBACKUP script action as shown in these steps:
From the Script Editor interface, choose Find from the Edit menu. In the Find What text box of the Find Text In Installation Script dialog box, enter Set Variable DOBACKUP To B and click Find Next.
Double-click the selected script action line to display the Set Variable dialog box and change this variable value from B to A. This change causes any replaced files to be backed up during the installation script execution.
Click OK to return to the Script Editor interface, shown in Figure 14.40.
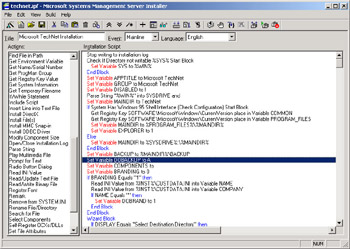
Figure
14.40: The Script Editor interface, with a modified script
action line selected.
Verify the location of the backup files by searching for the variable Set Variable Backup To. This variable will show the location of the backup files. Modify this value as appropriate for the target computers.
| Note |
Rollback support is meant for restoring specific files and values and not for uninstalling an application—that’s what uninstall support is for. Using rollback to uninstall implies that every file or setting that’s modified needs to be backed up, which isn’t always practical or desirable. |
The Uninstal.exe file that’s copied to the target computer during the SMS Installer–generated executable file execution is used to perform the actual rollback. You can use two methods to uninstall or roll back the client computer to its original configuration. If the installation is an application installation, it’s automatically added to Add/Remove Programs in Control Panel. All we have to do is select the application in the Add/Remove Programs dialog box and click Remove. The SMS Installer Uninstall Wizard appears, enabling you to perform both the uninstall and the rollback.
The second method is to manually run Uninstal.exe from the application’s main directory. The uninstall routine prompts for the name of the installation log generated by the installation package—usually Install.log—and then begins the removal process. Uninstal.exe also supports a silent mode using the /s para- meter from the command line—all of which means, of course, that you could create an unattended SMS package that removes the application for you.
If an uninstall or a rollback has been configured for an SMS Installer–generated executable file, a log file (Install.log) is generated during the installation process and saved in the application directory created on the target computer. This log file contains entries for the files that were copied or installed as well as every registry entry that’s created or modified. Additional changes—including icons that were created, shortcuts, and any files that were replaced, such as DLL files—will be archived to the backup location if rollback support is enabled. This log file will be used in the uninstall or rollback process to return files to their original versions and to return all registry settings to their prior configuration.
Also, when the script needs to modify existing INI files, it comments out the line that needs to be modified by adding “;SMS” at the beginning of the line and then writing the new line above it. This way, when an uninstall or a rollback occurs, the process simply searches for the ;SMS entries, deletes the line above, and removes the comment prefix. Clever, eh?
As with package installation, you can also configure SMS Installer to generate an uninstall status MIF file to indicate that the application has been removed. As we’ve seen in the section of this chapter entitled “Modifying Installation Scripts Using the Installation Expert,” the configuration of the uninstall status MIF file is done from the SMS tab of the Installation Interface dialog box. To create the uninstall MIF file, you must have configured an uninstall MIF filename, as shown previously in Figure 14.20, before compiling the SMS Installer– generated executable file.
|
|
< Day Day Up > |
|