To create a multi-column report, follow the steps below.
-
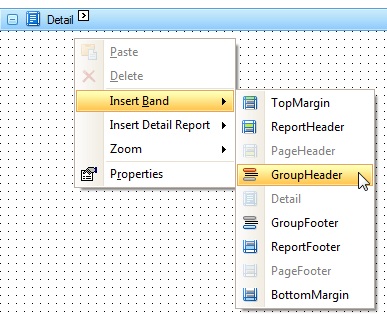
Add a Group Header bandto a report.
To do this, right-click anywhere over the report's surface, and in the invoked Context Menu, point to Insert Bandand click GroupHeader.
-
Drop a field, which will be used as a grouping criteria, from the Field Listonto the created GroupHeader1band.
-
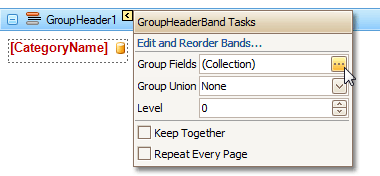
To define the report's grouping, select the GroupHeader1band and click its Smart Tag. In the invoked actions list, locate the Group Fieldsoption and click its ellipsis button.
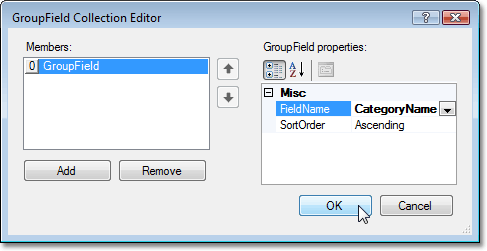
The GroupField Collection Editorwill appear. In this dialog, click Add, to create a grouping field and set its Field Nameto the same field as above.
-
Now, drop the required fields onto the report's Detail band.
-
Then, select the Detail band, and in the Property Grid, expand the Multi-Column Optionssection. Set the Column Countproperty to 3, Column Spacingto 20and Directionto First Across, then Down.
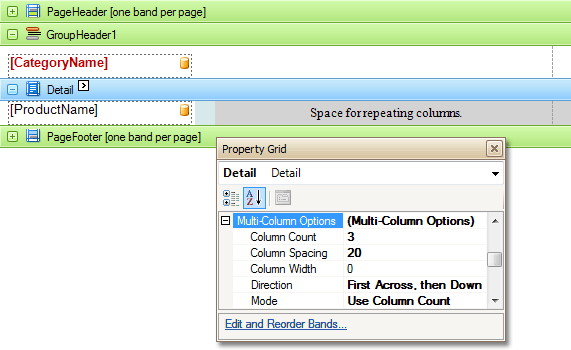
Now, on the Detail band's surface a grey area appears, delimiting the available column's width, and a blue area representing a space between columns.
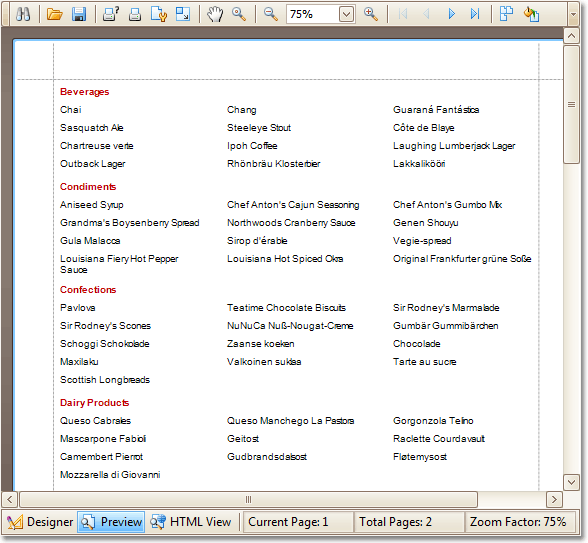
The multi-column report is now ready. Switch to the Preview Tab, and view the result.