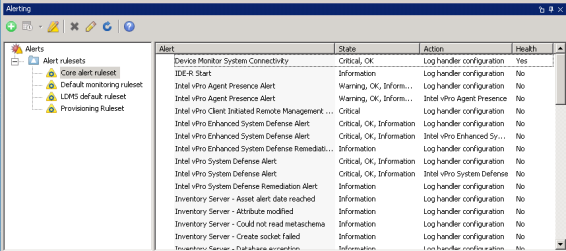
The Alert rulesets page displays all the alert rulesets
that you can deploy to managed devices. There are four rulesets
that appear by default, and you can create custom rulesets to apply
specific types of monitoring to different kinds of devices.
The four alert rulesets that appear by default on the Alert
rulesets page are:
Core alert ruleset: This ruleset ensures that alerts
originating on the core server are handled. This ruleset is
installed on the core server but can't be installed on other
devices, and you can only have one core alert ruleset. You can edit
the ruleset but can't delete it from the core server. This ruleset
contains a predefined group of alert types, including Device
Monitor, Intel vPro (Intel AMT) alerts, and Serial Over LAN Session
alert types.
Default monitoring ruleset: This ruleset is deployed by
default to all managed devices and contains a number of alert types
for real-time inventory and monitoring. You can edit this ruleset
to add other alert types and change the settings for the default
alert types.
LDMS default ruleset: This ruleset is deployed by default
to all LANDesk Management Suite managed devices. It includes alerts
for security features included in Management Suite, such as access
control, connection control manager, inventory scanner, and
Security and Patch Manager alerts.
Provisioning ruleset: This ruleset contains alerts
related to provisioning tasks, such as task begin and end, section
completed, and wrong OS pre-boot environment. When a device is
provisioned, this ruleset is used to send alerts related to the
progress of the provisioning task. (The ruleset is included in the
provisioning agent and does not need to be manually deployed.) You
can edit this ruleset to change the actions associated with the
provisioning alerts (for example, to be notified by e-mail when a
provisioning task is complete).
In addition to these rulesets you can create custom rulesets to
apply to targeted groups of managed devices. You can deploy
rulesets by scheduling a deployment task, or you can include
rulesets when you deploy agents to devices using agent
configuration. While the default rulesets are available to be
deployed with agents, you can choose not to deploy the rulesets
when you define the agent configuration.
Notes
When you create a custom ruleset for a device, be
aware that if a default ruleset has already been deployed to the
device you may have overlapping or conflicting alerting rules. If
you deploy the default ruleset when you configure the managed
device, and then deploy a custom ruleset, both rulesets will be
executed on the device. For example, if both rulesets generate
alerts for the same alert type but take different actions, you may
have duplicate or unpredictable alert actions as a result.
Every alert that you create rules for automatically
has a "Log handler configuration" rule so that every alert is
logged at the core server. When you create a new alert rule, a
second rule with the Log handler configuration action is created by
default. This default rule must always be in the ruleset: you can't
delete it unless you delete all rules for that particular alert. In
other words, if you have three rules for an alert, you can't delete
the default rule unless you delete all three rules, but you can
delete either of the other two rules for that alert.
Process for configuring a ruleset
Rulesets contain a collection of associated alerts, actions, and
time filters. As you configure a ruleset, you'll define multiple
action tasks and time filters that can be reused. The general
procedure for configuring a ruleset includes the following
steps:
Click the New alert ruleset button on the
toolbar. Type a name in the Name field, type a description
of the alert in the Description field, then click
OK.
To change the ruleset's name or description, select
it in the Alert rulesets list and click the Edit an alert
ruleset button on the toolbar.
To make a copy of a ruleset that you can make minor
changes to, right-click the ruleset in the list and select
Copy. Type a new name and description and click
OK.
To add new alert rules to a ruleset
In the Alert rulesets list, select the ruleset
and click Edit on the toolbar.
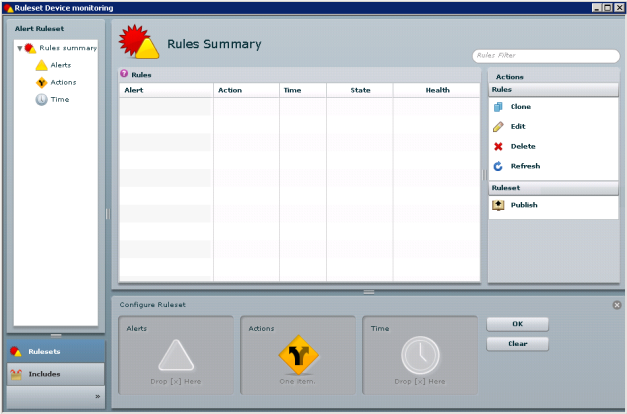
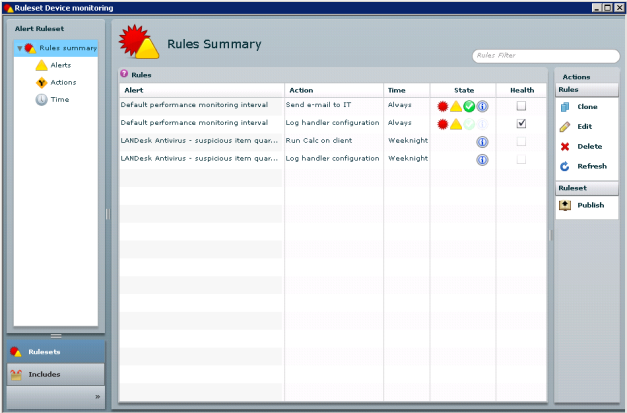
The Rules summary page lists each alert in the ruleset with
its associated actions and time. Each combination of an alert,
action, and time is listed as a separate item on the rules
summary.
Click Alerts in the left column to add an
alert rule to the ruleset.
In the right column, click Rules
> Add. Three "wells" are displayed at the bottom of the
page to associate alerts, actions, and time rules. Locate an alert
in the list and drag it to the Alerts well at the bottom of
the page.
Alerts are listed in two groups, Standard and
Monitor. Click an item under one of those groups to view a
group of associated alerts. If you click the All alerts
folder, all alerts are listed alphabetically.
To find a particular alert, type a search string in
the Alerts filter text box at the top right of the page. All
alerts containing the string you type are displayed in the
list.
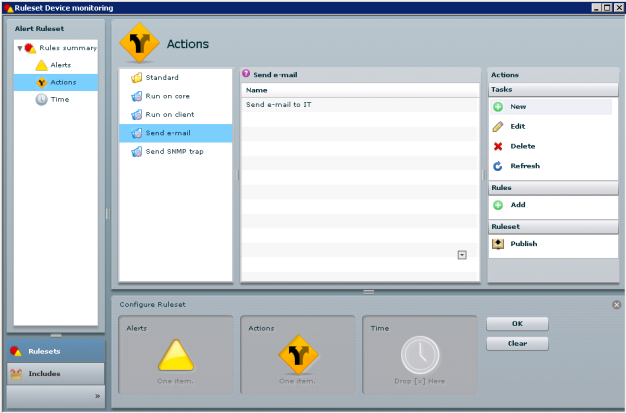
Click Actions to associate an alert action
with the alert you added. By default, every alert has a Log
handler configuration action associated with it, which logs the
alert at the core server. To add another action, drag it to the
Actions well at the bottom of the page.
The Standard folder contains predefined actions. To use
another type of action, you need to define the action first (see
To define alert actions to use in rules
).
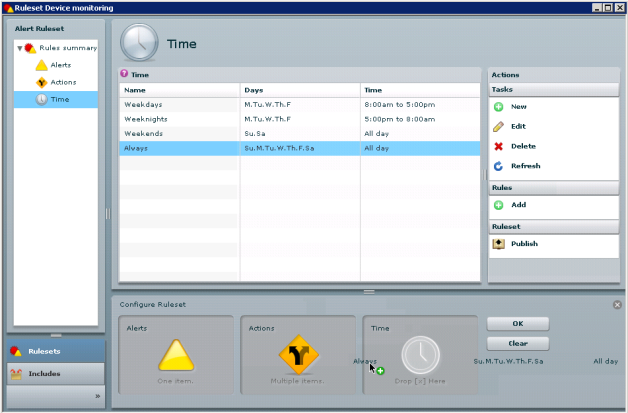
Click Time to specify how frequently the alert
should be monitored. Drag a time rule (for example, Always)
to the Time well at the bottom of the page.
When you have at least one alert with associated
action and time tasks, click the OK button at the bottom of
the page to add the alert rule to the ruleset. Click OK
again.
In the right column, click the Publish
button.
In the left column, click Rules summary to
view the updated ruleset with the new alerts.
With a list of alerts in the ruleset, you can edit each item to
change the associated action and time. You can also choose which
severity levels to apply to the alert and you can specify whether
that alert should contribute to the device health. For more
information about editing a rule, see To edit an alert
rule.
To define alert actions to use in
rules
In the left column of the Alert ruleset page,
click Actions.
Select an action group (for example, Send
e-mail), then click Tasks > New in the right
column.
Add information in the fields as needed, then click
Save.
The action is listed under the group you selected and is
available to associate with alerts. Details about the fields in the
different actions types are explained below.
Run on core/Run on client
This action starts an executable file on either the core server
or the managed device.
Name: the identifying name for the action. Be
specific so you can easily distinguish between actions.
Path and filename: the full path and filename
for the executable to be run on the core server or the managed
device. When the alert is triggered, the alerting agent will issue
a command to run this file.
When you select either action, note that programs may not
display as expected on the desktop. When the program is run, it is
started as a service in Windows and so is not displayed as a
regular application would be. Programs that are run in this way
should not contain a user interface that requires interaction. To
definitively determine if the program executed, check the processes
in the Windows Task Manager.
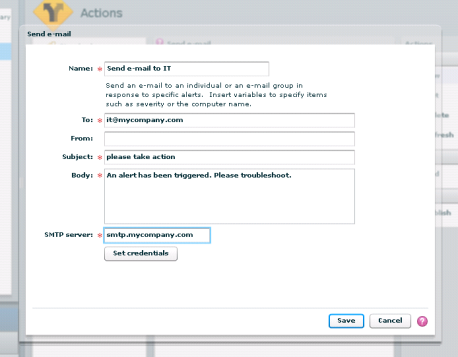
Send e-mail
This action sends an e-mail message using the SMTP server you
specify.
Name: the identifying name for the action. Be
specific so you can easily distinguish between actions.
To: the full e-mail address of the person you
want to the receive the e-mail notification.
From: any valid e-mail address, preferably one
that indicates that the e-mail is an alert notification. If this is
not a valid e-mail address the message will not be sent.
Subject: a descriptive subject for the e-mail
notification.
Body: a message to accompany the alert
notification.
SMTP server: the location of an SMTP server
from which the e-mail can be sent.
Set credentials: click to specify a username
and password that can be used to log on to the SMTP server.
The e-mail will be sent from the core server.
You can send e-mail messages to multiple recipients, and you can
use the following variables in the Body field:
%% = %
%D = Description
%N = Computer name
%S = Severity
%T = Time (UTC)
Send SNMP trap
This action sends an SNMP v1 trap when the alert is
triggered.
Name: the identifying name for the action. Be
specific so you can easily distinguish between actions.
Host name: the name of the SNMP host that will
receive the trap.
Community string: a v1 community string that
is used by the host to receive traps.
Severity levels for alerts are reported in the Specific Trap
Type field of the trap. Values are 1 = Unknown, 2 = Informational,
3 = OK, 4 = Warning, and 5 = Critical.
To define time filters to use in
alert rules
In the left column of the Alert ruleset page,
click Time.
Click Tasks > New in the right
column.
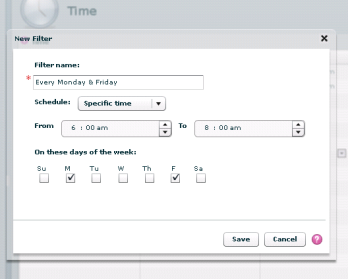
In the New filter
dialog box, enter data in the fields (described below).
Click Save.
The time filter appears in the list and is available to
associate with alerts. Details about the fields in the New
filter
dialog box are explained below.
Filter name: the identifying name for the
filter.
Schedule: select Specific time for a
filter that limits the time and days when the alert is monitored.
Select Anytime to monitor the alert continually.
From and To: select a beginning and
ending time during the day when the alert is monitored.
On these days of the week: select the days
that you want the alert monitored.
To edit an alert rule
You can edit individual alert rules in the Rules summary
page. Changes you can make include selecting a different action or
time filter, selecting which severity levels are in effect, and
specifying whether the rule contributes to the device's health
status.
Click Rules summary to view the alert rules in
the current ruleset.
Click the alert rule you want to edit and click
Rules > Edit in the right column.
To change the associated action or time, select a new
option from the respective list.
To receive an alert notification only for particular
severity levels, click the State icons. A dimmed icon
indicates that alerts for that severity level will be ignored.
To include the alert rule as an indicator of device
health, select the Health check box.
Click OK to save your changes.
Each alert rule can have only one associated action and one time
filter. If you want to create additional rules for an alert, click
Clone in the right column to create a duplicate of the rule,
then edit the duplicate.
To include rulesets within other
rulesets
One way to make ruleset creation more flexible is to create
smaller rulesets that you then combine for different uses. To do
this, you can include rulesets within other rulesets.
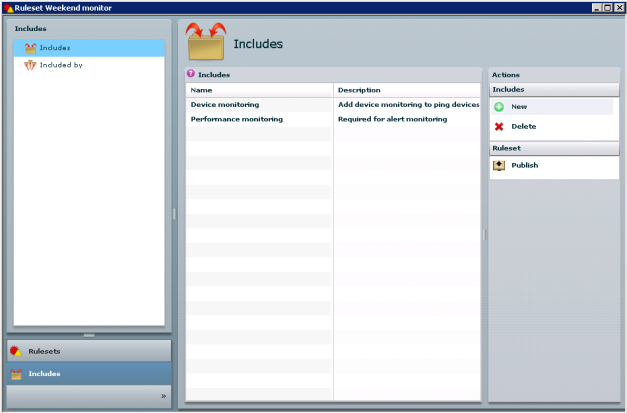
At the bottom left of the Alert ruleset page,
click Includes.
In the left column, click Includes.
In the right column, click Includes
> New.
In the Available rulesets
dialog box, select one or more rulesets to include in the current
ruleset, then click Save. Use Ctrl+click or Shift+click to
select multiple rulesets.
The rulesets are added to the Includes list.
If you want to remove a ruleset from the
Includes list, select it and click Includes
> Delete in the right column.
To see which other rulesets include the current
ruleset, click Included by in the left column.
When you include rulesets, each individual ruleset is maintained
as an individual XML file. The XML files are not combined, but they
reference each other
To publish an alert ruleset
After you have added and edited rules in a ruleset you need to
publish the ruleset. This creates an XML file with the ruleset data
that is referenced by the alerting agent as it works.
On the Rules summary page, click
Publish in the right column.
Click OK at the success message.
The XML files with published ruleset data are stored in the
ldlogon share on the core server, in the alertrules folder.
When you publish a ruleset, the alerting service is notified to
reload the updated rulesets. When you have updated a ruleset that
you have already deployed to managed devices, each of those devices
will automatically update their rulesets with the modified rules
the next time the alerting agent runs on those devices.
If you don't publish a ruleset, there will be no signal to the
alerting service to reload the ruleset, so there will be no
automatic update of the ruleset on devices that already have the
ruleset. We strongly recommend that you publish rulesets every time
you make any changes to them.