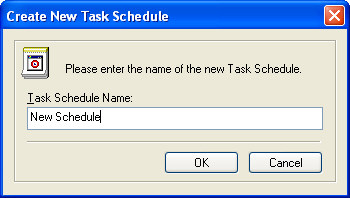
Within DNTU’s Task Scheduler View, there are two ways to create a new scheduled task. You can either right-click in an open area in the Scheduled Tasks window and then choose Add Schedule or you can click on the Add Schedule Mini Toolbar Button. A dialog will appear prompting for the name of your new scheduled task
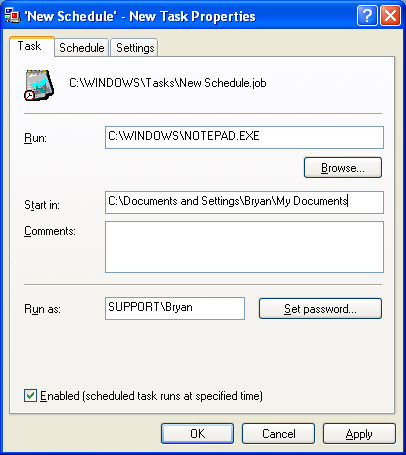
Once you provide a name for your new task, the "New Task Properties" dialog will be displayed. Within the New Task Dialog, there are three properties tabs for the new task:
Task: On this tab, you provide the path and filename of the program to be run, along with any switches/options as necessary. You can also provide comments, and indicate which user and password the task should be run as. A checkbox indicates whether the job is enabled (if this box is cleared, the task in disabled and will not execute at the scheduled time.
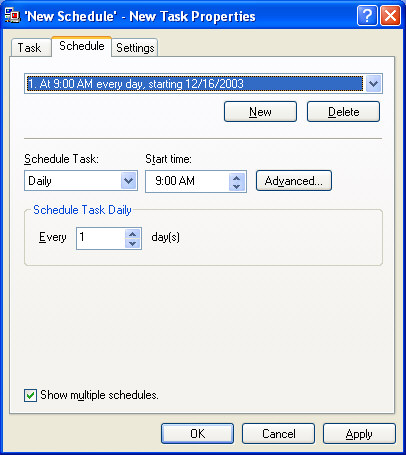
Schedule: On this tab, you can set the time and interval for the task to execute. Initially this task will show as "unscheduled". Simply click on the New button to begin scheduling your new task. Many scheduling options are available, depending on which schedule you use (daily, once, at idle, etc.). It is even possible to create more than one schedule for a task. For instance, you may wish to run a task every Tuesday, but also every time the system starts.
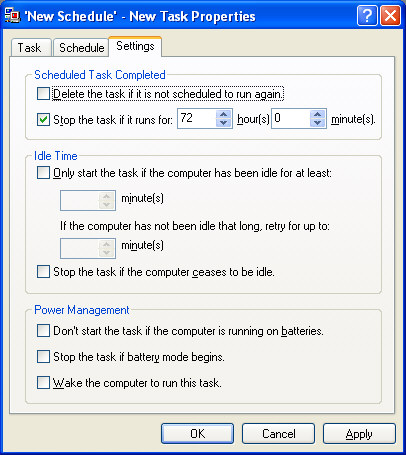
Settings: This tab contains various options that may affect when and how you want the task run, and what to do after the task completes. For instance, you can Stop the Task if the machine goes into battery mode. You may also want the task to be stopped automatically if it runs too long.
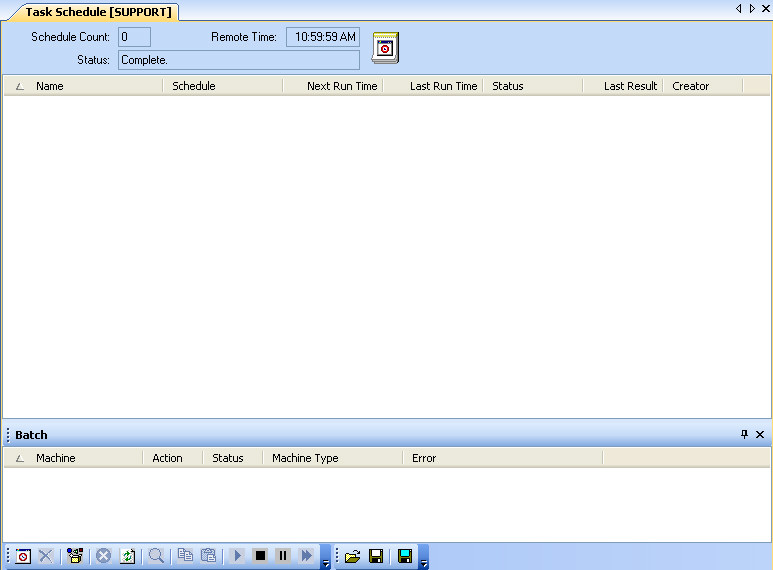
To view existing Scheduled Tasks, you can use either use DNTU’s Schedule View or you can also view them within the Operating System itself. You can either click Start / Programs / Accessories / System Tools / Scheduled Tasks, or you can also double-click on the Scheduled Tasks item in the Control Panel.