Add the node
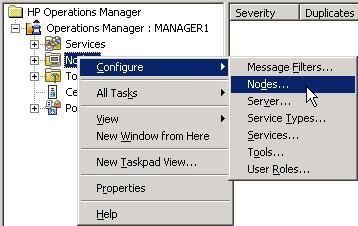
- Right-click the Nodes folder in the console tree and the
click Configure
 Nodes...
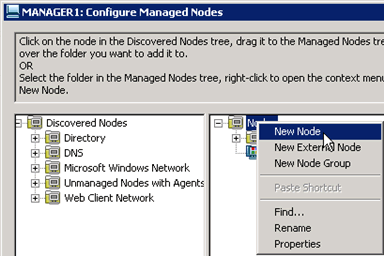
- From within the Configure Managed Nodes dialog box, right-click
the Nodes folder to open the shortcut menu.

-
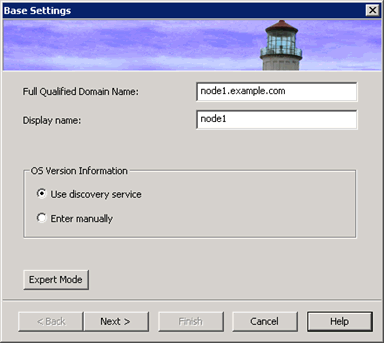
Click New Node to open the new node wizard.
 For this basic training,
configure a new node that has a Windows operating system. Keep all
the default options in the wizard.
For this basic training,
configure a new node that has a Windows operating system. Keep all
the default options in the wizard.If you don't know what a particular box requires, click the Help button for additional information.
- Click Next as you complete each page in the wizard.
- Click Finish on the final page to add the node and close the wizard.
Install the agent
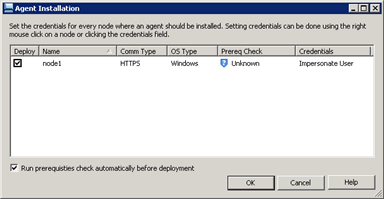
- After you add the node, click OK to close Configure
Managed Nodes dialog box. The Agent Installation dialog box opens.

- Keep all the default options, or click Help for additional information. The default for Credentials assumes that you have administrative access to the node.
- Click OK to deploy the agent.
Grant the certificate request
- In the console tree, click Policy management
 Deployment jobs to monitor the progress of the agent
installation.
 - After the agent installation job completes, click Certificate requests in the console tree. Certificates enable nodes to communicate securely with the management server, so you must grant this request.
- Right-click the certificate request, and then click All
Tasks
 Grant.